Golden Pavlova with Summer Berries and Salted Chocolate Sauce

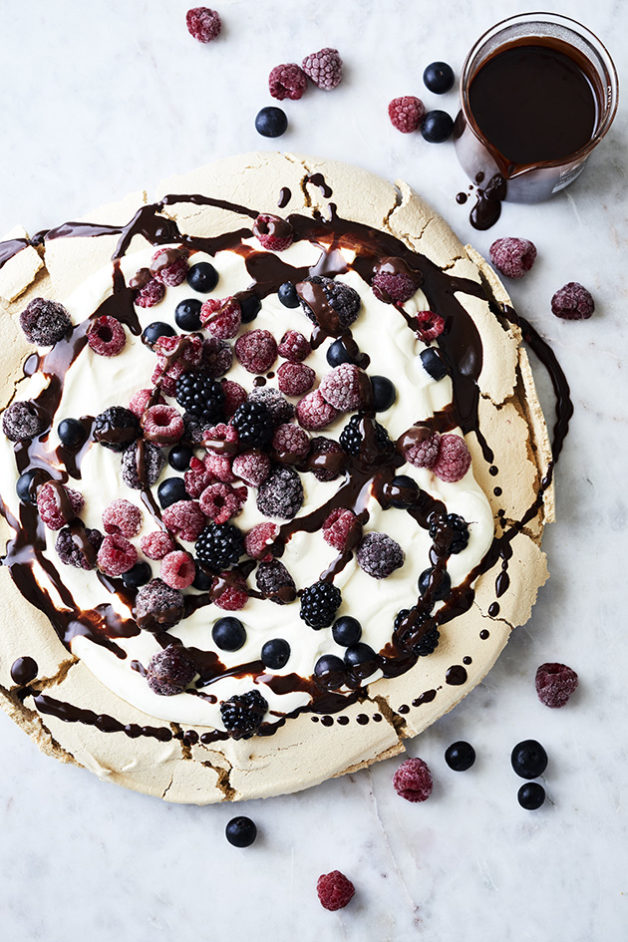
Golden Pavlova with summer berries and salted chocolate sauce. Cooking with Salt. Recipes, foodstyling, styling & photography by Manja Wachsmuth

GOLDEN PAVOVA WITH SUMMER BERRIES AND SALTED CHOCOLATE SAUCE
Server 6-8

A Pavlova recipe with a golden twist and a salty chocolate sauce that breaks with the sweet pav and the tart summerberries.

Pavlova:
6 egg whites, at room temperature
380g brown sugar
4 tsp. cornflour
2 tsp. cider vinegar
1 tsp. vanilla extract

Salted Chocolate Sauce:
100g dark chocolate of good quality
150 ml single cream
1 tbsp. syrup
2 tsp. sea ​​salt flakes

Garnish:
200 ml single cream, whipped to peaks
100g Blueberries (fresh or frozen)
100g Blackberry (fresh or frozen)
100g Raspberries (fresh or frozen)

Golden Pavlova:
Preheat the oven to 140 ° C. Place baking paper on a baking tray. Whip egg whites until they stiff and then gradually add brown sugar until the meringue forms soft peaks and is shiny. Be patient, it may take up to 10 minutes. Then add corn flour, vinegar and vanilla and whip on low setting until the meringue is even. Arange the meringue on baking paper on a baking tray and shape it in a large circle, about 5-6 cm high using a rubber spatula. Smooth the edges with the spatula and then bake approx. 1 hour until it is firm and light golden. Turn off the oven and leave to cool completely before serving. The Pavlova can be made a few days in advance and stored in an airtight container.

Salted Chocolate Sauce:
Heat water in a large sauce pan on the stove and place a heatproof bowl that fits into the pan so that the water touches the bottom of the bowl. Then slowly melt the chocolate into the water bath while stirring occasionally with a silicone / rubber spatula. When the chocolate is melted add the syrup and mix thoroughly. Then add whipped cream into small portions and stir continuosly until the sauce is smooth. Finally, taste with sea salt.

Gather the pavlova by distributing whipped cream over it in a smooth layer and decorate with berries and salted chocolate sauce. If you are using frozen berries, leave the pavlova for 10-15 minutes before serving so they can thaw a bit. Serve with extra chocolate sauce.

This recipe is part of my salt story published in Matmagasinet Nord #23 2017, focusing on using salt as a main ingredient for cooking or flavouring. Try these recipes from this series too:
Blackberry Grav Lax
Salt & Vinegar Potato Skins
Bork Belly in Brine with Cripsy Crackling
Salt Dough Baked Leg of Lamb
The Perfectly Salty Margaria
Oozy Salted Chocolate Caramel Tart
Salted Caramel Ice Cream

© Manja Wachsmuth 2017. This recipe is a modification of a Delaney Mes‘ recipe for NZ House & Garden Magazine published earlier this year.

Salted Caramel Ice Cream

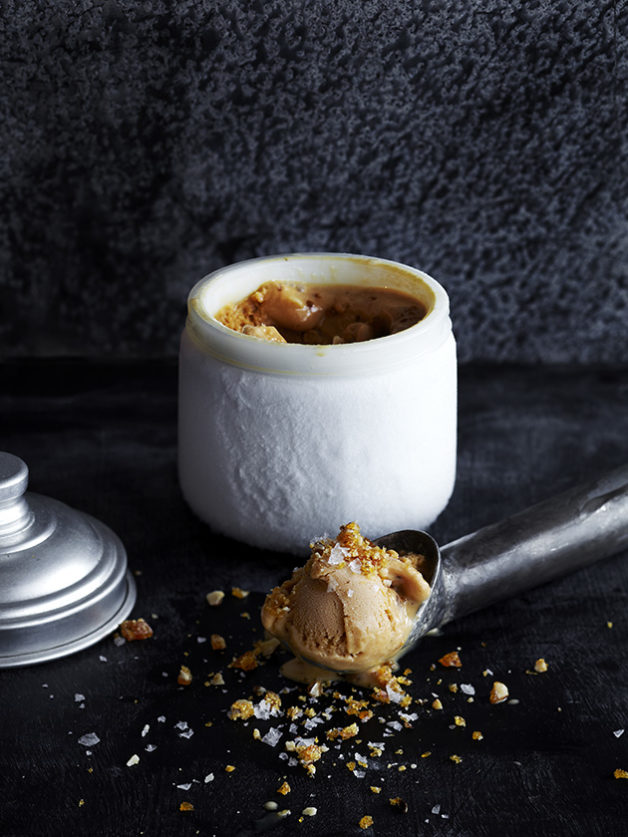
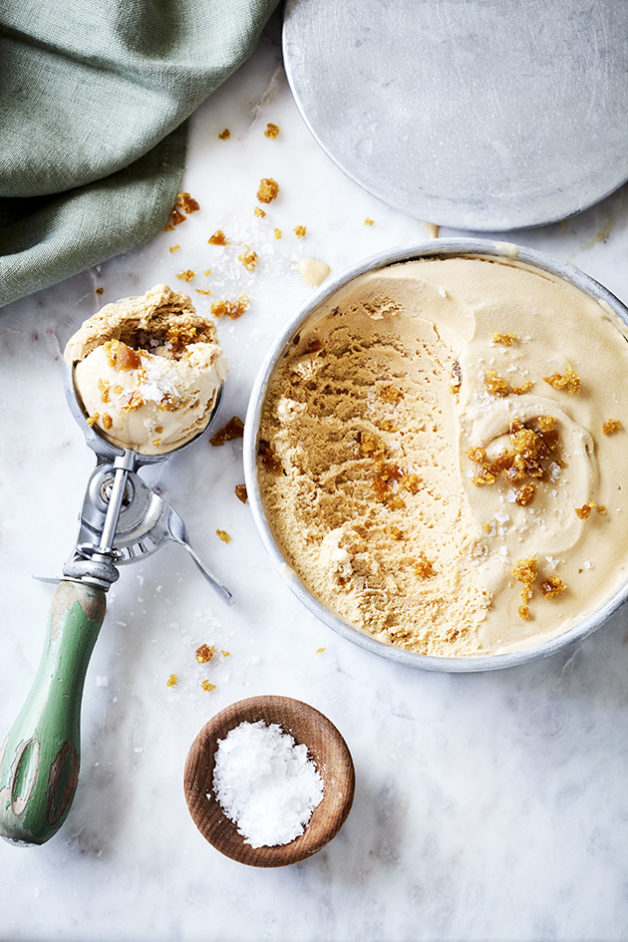
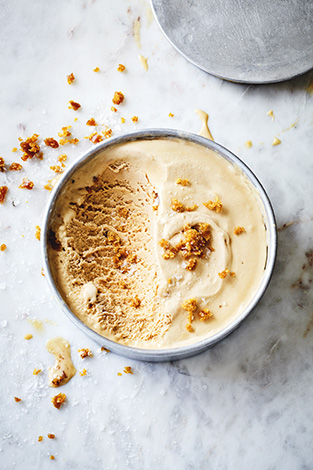
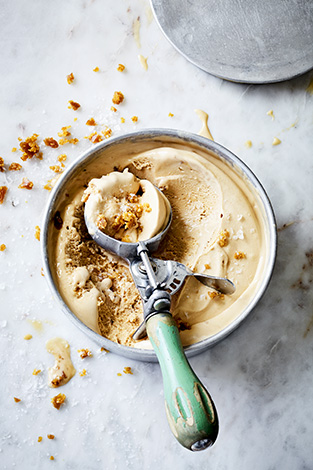
Salted Caramel Ice Cream. Cooking with Salt. Recipe, styling, food styling & photography by Manja Wachsmuth

SALTED CARAMEL ICE CREAM
Makes 1 litre

This here, is probably the worlds best salted caramel ice cream! So good infact, I’ll advice you to make a double batch because this one will be gone within a few days, tops!

500 ml cream (single cream)
250 ml whole milk
3 large egg yolks, beaten and set aside
1 jar genuine Dulce de Leche
1½ tsp sea salt flakes
200g sugar
50g butter

Method Ice Cream Mix:

Place a medium size pot on the stove and bring milk and cream to a simmer stirring continuously to avoid burning. Simmer for a couple of minutes, then set aside to cool slightly for 10-15 min.

Once cooled, pour the warm milk mixture, in a slow stream, into a bowl with the beaten egg yolks, whisking constantly. Pour custard back into the pot and heat over medium heat, stirring constantly with a wooden spoon, until custard coats back of spoon and registers 85ºC on an instant-read thermometer (do not let boil). Set aside until caramel is prepared.

Pour dulce de leche into a pot and heat over low heat until smooth and liquid. Stir continuously to avoid burning. Add sea salt flakes to taste. Add caramel mixture to ice cream mixture and combine well. Cool over ice bath, then refrigerate for 12-24 hours.

Method crunchy caramel:

Heat sugar over medium heat in a pan until edges begin to melt. Gently push melting sugar with a heatproof spatula from edges to center of pan stirring until the sugar has dissolved. Continue cooking swirling pan occasionally so sugar melts evenly. Add butter and combine thoroughly. Remove from heat and pour into a heat proof dish. Set aside to cool. When caramel has cooled, it will be hard. Chop into small pieces and set aside until ice cream mix is ready for churning.

Just before churning, add crunchy caramel to ice cream mix, then churn in ice cream maker according to manufacturer’s instruction. Spoon into an airtight freezer container, cover and freeze until solid.

Serve the salted caramel ice cream in ice cream cones, sprinkle with extra crunchy caramel and sea salt flakes.

This recipe is part of my salt story published in MAD&venner #129 2015 & Matmagasinet Nord #23 2017, focusing on using salt as a main ingredient for cooking or flavouring. Try these recipes from this series too:
Blackberry Grav Lax
Salt & Vinegar Potato Skins
Bork Belly in Brine with Cripsy Crackling
Salt Dough Baked Leg of Lamb
The Perfectly Salty Margaria
Oozy Salted Chocolate Caramel Tart
Golden Pavlova with Summer Berries and Salted Chocolate Sauce

© Manja Wachsmuth 2017. Thanks to Natasha MacAller for helping me shoot the moody shot on this page and for teaching me how to make salted caramel ice cream. This recipe was originally hers, however I have simplified and modified it heavily since then.

Salted Caramel Ice Cream. Cooking with Salt. Recipe, styling, food styling & photography by Manja Wachsmuth Salted Caramel Ice Cream. Cooking with Salt. Recipe, styling, food styling & photography by Manja WachsmuthSalted Caramel Ice Cream. Cooking with Salt. Recipe, styling, food styling & photography by Manja Wachsmuth

Oozy Salted Chocolate Caramel Tart

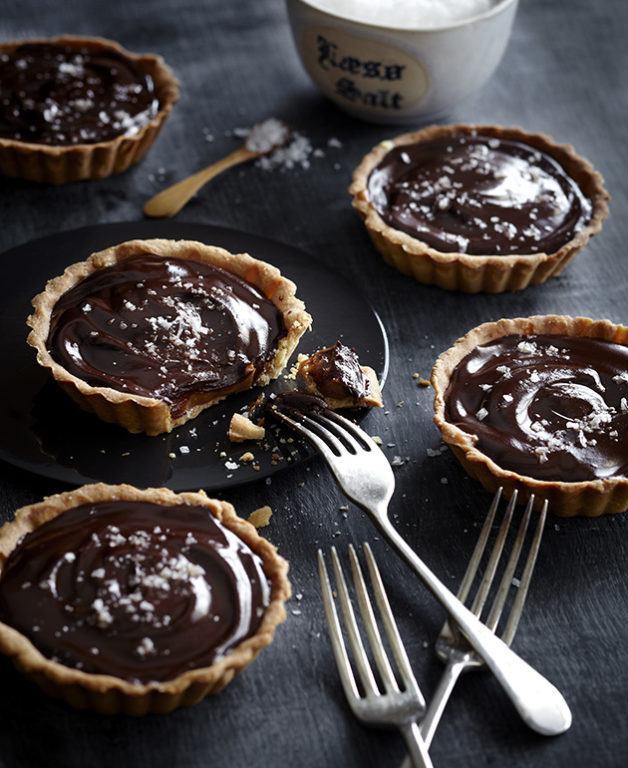
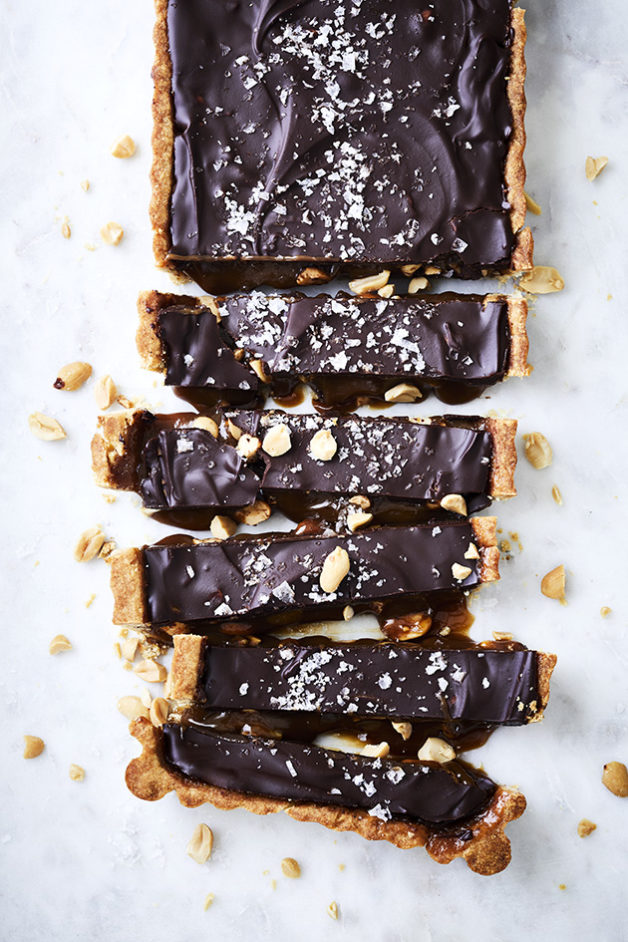
Salted Chocolate, Caramel Tarts. Cooking with Salt. Recipes, foodstyling, styling & photography by Manja Wachsmuth

OOZY SALTED CHOCOLATE CARAMEL TART
Serves 12

This delicious oozy salted chocolate, caramel tart has a surprising layer of crunch, and will satisfy any chocolate and salted caramel craving.

Tart shells:
Makes 1 tart of 12 cm x 35 cm or 12 small tart shells of 10 cm diameter.
Half the dough can be frozen for later use.

140g unsalted butter, softened
85g vanilla sugar
1 large egg
225g plain flour, sifted

Caramel filling:
450g glass Dulce de Leche
1 tsp. sea ​​salt
100g butter, melted
100g golden or rice malted syrup
80g peanuts, roughly chopped

Chocolate layer:

200 g dark chocolate, finely chopped
25 ml of whipped cream
2 tsp. golden or rice malted syrup
2 tsp. sea ​​salt

Method tart shells:

In a stand mixer, beat butter on medium speed until smooth but not whipped. With mixer on low, stream sugar into butter until well combined. Add the egg until incorporated. Add flour in 3 stages just until incorporated. Don’t overwork the dough. Turn out onto a board and work with a dough scraper until smooth. It should feel like “play dough”. Shape into 2 discs, wrap tightly in double plastic and chill until ready to shape into the tart pan.

Preheat the oven to 175ºC.

When ready to bake, remove from plastic and pat out into pan smoothing the dough with your hands. If it gets too soft place in fridge and chill until firm and then rework the dough. You may also roll chilled dough into rounds between layers of plastic wrap. Peel off bottom layer and place in tart pan shaping sides to fit snugly. Cover and chill until firm. Place a sheet of parchment inside tart shell and fill with pie weights.

Bake at 175ºC for about 15 minutes until edges are browned. Carefully remove parchment and pie weights. Return to oven and bake until just lightly browned, about 12 min. Remove from oven when done, and set aside to cool completely, before removing tart tins.

Method chocolate ganache:

Put chopped chocolate in a small bowl and place inside a medium sized bowl. Boil 500ml of water, and pour into the medium sized bowl, to melt the chocolate over a water bath. Heat cream until steamy in a small saucepan. Pour heated cream over chocolate and let stand for 1 minute then slowly stir until chocolate is melted. Do not refrigerate but set aside until ready to assemble.

Method caramel filling and assembly:

Place the Dulche de Leche in a small pot, and heat on the stove on low-medium heat to smoothen it up, mix in melted butter, syrup and sea salt. Mix till well combined and smooth. Fill tart shell 2/3 and add a layer of chopped peanuts. Cover with a layer of chocolate ganache and sprinkle with sea salt. Serve immediately.

This recipe is part of my salt story published in MAD&venner #129 2015 & Matmagasinet Nord #23 2017, focusing on using salt as a main ingredient for cooking or flavouring. Try these recipes from this series too:
Blackberry Grav Lax
Salt & Vinegar Potato Skins
Bork Belly in Brine with Cripsy Crackling
Salt Dough Baked Leg of Lamb
The Perfectly Salty Margaria
Salted Caramel Ice Cream
Golden Pavlova with Summer Berries and Salted Chocolate Sauce

© Manja Wachsmuth 2017. The recipe for the tart dough is kindly supplied by the fabulous Natasha MacAller – for more of her recipes; check out her books Vanilla Table and Spice Health Heroes.

Salted Chocolate, Caramel Tarts. Cooking with Salt. Recipes, foodstyling, styling & photography by Manja Wachsmuth

The Perfectly Salty Margarita

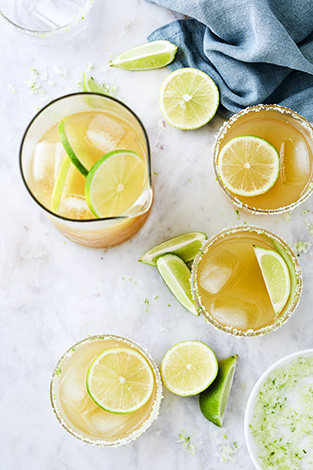
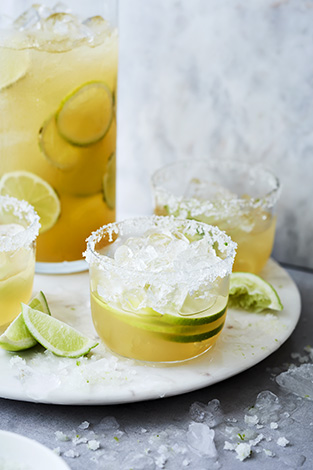
The Perfectly Salty Margarita. Cooking with Salt. Recipes, foodstyling, styling & photography by Manja WachsmuthThe Perfectly Salty Margarita. Cooking with Salt. Recipes, foodstyling, styling & photography by Manja Wachsmuth The Perfectly Salty Margarita. Cooking with Salt. Recipes, foodstyling, styling & photography by Manja Wachsmuth

THE PERFECTLY SALTY MARGARITA
Serves 4

The original zingy flavor of summer, this refreshing cocktail is bound to bring a good mood to any summer gathering. The salted rim on the glasses is the perfect flavor combination with the tequila and the zingy lime.

375 ml lime juice (juice of app 15 limes)
175g caster sugar
6 cups of crushed ice
165 ml good quality tequila
2 limes cut into wedges
Soda to serve

Rim glasses:

Cest of 1 lime
2 tbsp of sea salt flakes
1tbsp of sugar

Method Margarita:

Blend lime juice and caster sugar in a blender until sugar has dissolved. Transfer mixture to a large jug. Whizz crushed ice in batches in a food processor until slushy. Add to jug with tequila and stir well.

Method glass rim:

Mix lime zest, sea salt and sugar in a bowl and spread out on a plate in an even, thick layer. Use a wedge of lime to rub around the rim of 4 chilled glasses, and then dip each glass into the salt/ sugar mix to lightly coat the rim. Serve margarita in prepared glasses with extra lime wedges and a dash of soda (if desired).

The Perfectly Salty Margarita & Pink Grapefruit Margarita. Cooking with Salt. Recipes, foodstyling, styling & photography by Manja Wachsmuth Pink Grapefruit Margarita. Cooking with Salt. Recipes, foodstyling, styling & photography by Manja Wachsmuth

PINK GRAPEFRUIT MARGARITA
Serves 4

For a sweeter version of the classic margarita, the pink grapefruit is a festive colour and less sour than the the lime version. Still the salt cuts the sweet, tangy taste of the grapefruit.

325 ml pink grapefruit juice (juice of 4-5 grapes)
50 ml lemon juice (juice of 2 lemons)
100g caster sugar
6 cups of crushed ice
165 ml good quality tequila
1 grapefruit cut into slices
Soda to serve

Rim glasses:

Cest of 1 lemon
2 tbsp of sea salt flakes
1tbsp of sugar

Method Margarita:

Blend grapefruit juice, lemon juice and caster sugar in a blender until sugar has dissolved. Transfer mixture to a large jug. Whizz crushed ice in batches in a food processor until slushy. Add to jug with tequila and stir well.

Method glass rim:

Mix lemon zest, sea salt and sugar in a bowl and spread out on a plate in an even, thick layer. Use a wedge of lemon to rub around the rim of 4 chilled glasses, and then dip each glass into the salt/ sugar mix to lightly coat the rim. Serve margarita in prepared glasses with slices of grapefruit and a dash of soda (if desired).

Drink responsibly!

This recipe is part of my salt story published in MAD&venner #129 2015 & Matmagasinet Nord #23 2017, focusing on using salt as a main ingredient for cooking or flavouring. Try these recipes from this series too:
Blackberry Grav Lax
Salt & Vinegar Potato Skins
Bork Belly in Brine with Cripsy Crackling
Salt Dough Baked Leg of Lamb
Oozy Salted Chocolate Caramel Tart
Salted Caramel Ice Cream
Golden Pavlova with Summer Berries and Salted Chocolate Sauce

© Manja Wachsmuth 2017

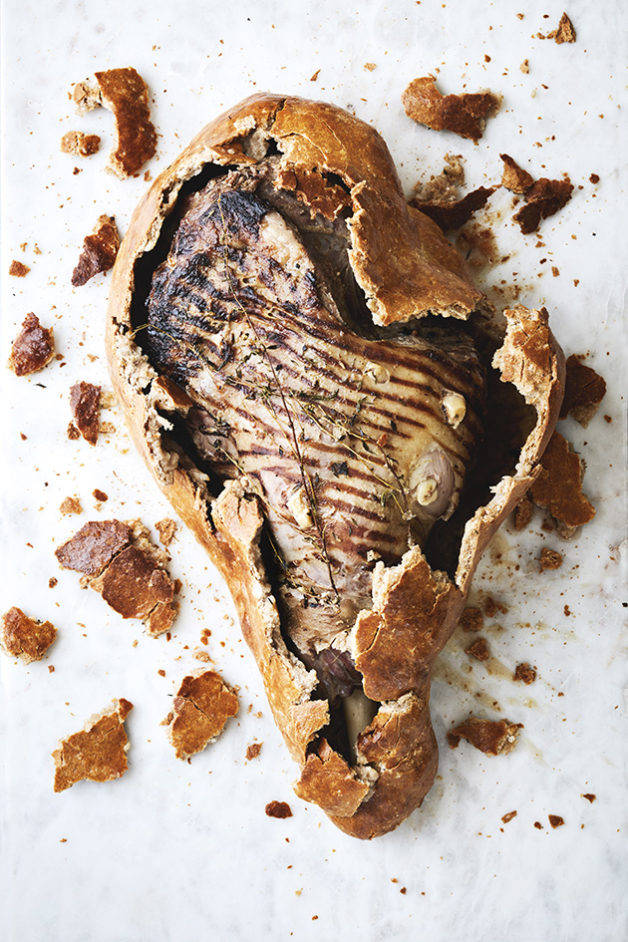
Salt Dough Baked Leg of Lamb

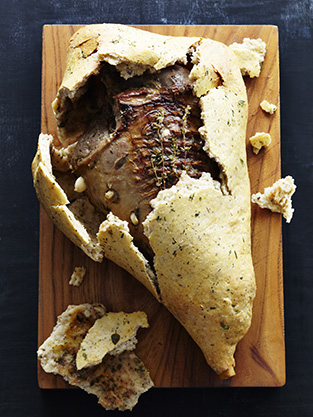
Salt Dough Leg of Lamb. Cooking with Salt. Recipes, foodstyling, styling & photography by Manja Wachsmuth

SALT DOUGH BAKED LEG OF LAMB
serves 8-10

Baking a Leg of Lamb in salt dough takes a bit of patience and concentration, but slow cooking your meat like this, ensures great flavor and moisture and it will be worth all your efforts. Furthermore cracking the crust open at the dinner table is a bit of a showstopper!

2 kg leg of lamb, French trimmed
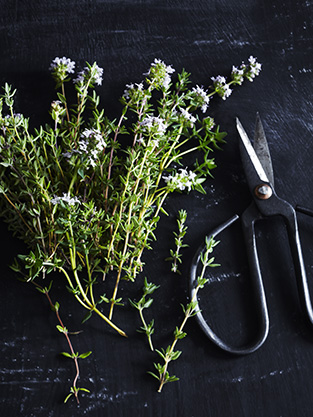
1 tbsp finely chopped thyme
6 cloves garlic, halved lengthways
1 tbsp Dijon mustard
Extra thyme leaves on stem

Salt dough:

700g/ 6 cups plain flour
300 g / 2 ½ cup sea salt
1 ½ tbsp freshly ground pepper
3 egg whites, lightly beaten
1 ½ cup/ 375 ml water
2 egg yolks mixed with a little cold water

Method leg of lamb:

Pre heat the oven to 180ºC

Combine the thyme and the mustard in a small bowl. Cut 12 deep slits in the leg of lamb and push in the garlic cloves. Rub the mustard paste over both sides of the lamb. If you have a large flat grill plate, the leg of lamb can be browned and cooled before rubbing with the mustard mixture. This doesn’t change the flavour, but does make the lamb look more attractive when the crust is broken.

Method salt dough:

Mix flour, salt and pepper in a bowl to combine. Slowly add the combined egg whites and water to make dough, stirring with a spoon, adding a little more water if necessary to bring the dough together. Tip onto a lightly floured bench and knead for a couple of minutes until well combined. Don’t let the dough rest, as this will make it dry out.

Roll the dough to a large 40 cm x 45 cm rectangle.

Place extra thyme leaves on stem on the dough and the leg of lamb on top, presentation side down, and bring the sides of the dough up, over the lamb. Wet the edges of the pastry and press firmly to make sure the lamb is completely sealed. Turn the lamb right side up and place on a lined baking tray. Wet the pastry where necessary and smooth with your fingers to seal any cracks, making sure the dough is sealed tightly. Brush the dough with egg wash.

Roast for 1 ½ hours, then remove from the oven and rest the leg of lamb for 15 minutes.

To serve:

Carefully break the crust open and pour the cooking liquids into a jug (or discard). The cooking liquids can be used as a stock for making gravy to accompany the lamb. Lift the lamb out of the crust, then carve against the grain and serve.

Thyme. Cooking with Salt. Recipes, foodstyling, styling & photography by Manja Wachsmuth. Recipes for MAD&venner. Salt Dough Leg of Lamb. Cooking with Salt. Recipes, foodstyling, styling & photography by Manja Wachsmuth. Recipes for MAD&venner.

This recipe is part of my salt story published in MAD&venner #129 2015 & Matmagasinet Nord #23 2017, focusing on using salt as a main ingredient for cooking or flavouring. Try these recipes from this series too:
Blackberry Grav Lax
Salt & Vinegar Potato Skins
Bork Belly in Brine with Cripsy Crackling
The Perfectly Salty Margarita
Oozy Salted Chocolate Caramel Tart
Salted Caramel Ice Cream
Golden Pavlova with Summer Berries and Salted Chocolate Sauce

© Manja Wachsmuth 2017

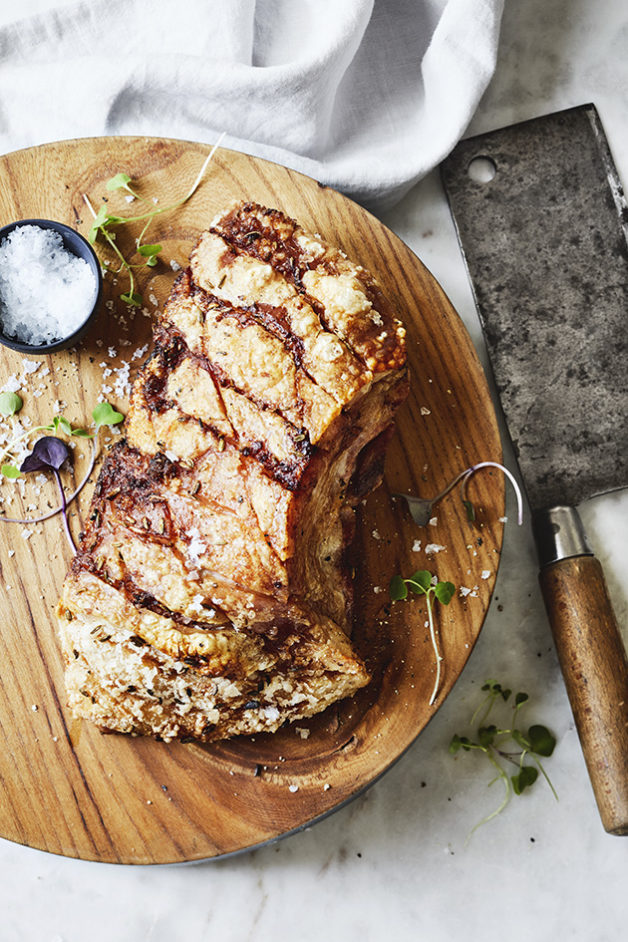
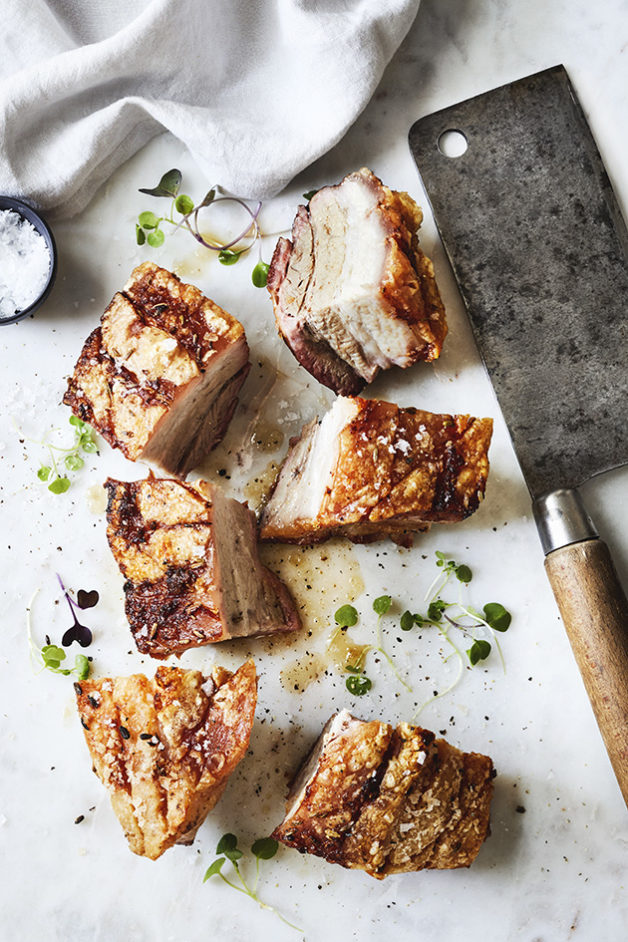
Bork Belly in Brine with Cripsy Crackling

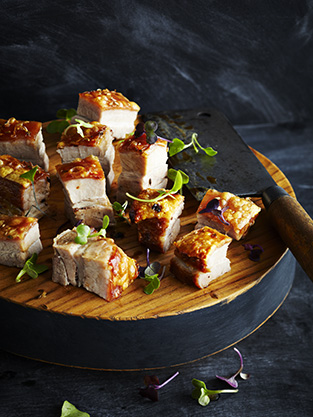
Cooking with Salt. Pork Belly in Brine with Crispy Crackling. Recipes, foodstyling, styling & photography by Manja Wachsmuth

PORK BELLY IN BRINE WITH CRISPY CRACKLING
Serves 4, as part of a main course

Nothing beats a properly done pork belly. This recipe brines the meat, ensuring a really nice flavour and crispy crackling. You can either do this in the oven or try it on the BBQ for a delicious meal on those long, bright summer nights.

1 kg Pork Belly, skin on
30 g Sea Salt Flakes
1 tsp Fennel Seeds
250 ml Water

Method Oven:
Score the skin of the pork belly in slices or squares. Be careful not to cut into the meat.
Place the pork belly in a non-reactive, deep-sided roasting dish. Rub the salt into the meat on both sides and leave for 30 minutes. Turn the belly so the skin is facing down, and then cover in enough cold water to submerge the meat. Cover tightly and place in the fridge for 24-48 hours.

Preheat the oven to 250º C.

Drain the brine from the pork belly and pat it dry all over with a paper towel. Make sure that the skin is completely dry, otherwise it won’t crackle. Rub the skin with a little olive oil and sprinkle with flaky sea salt and fennel seeds. Place the pork skin side up on a rack that fits in a roasting dish and roast in the oven for 45 min, or until the skin starts to crackle. Remove from the oven and reduce temperature to 180ºC. Pour water into the roasting dish, ensuring that the skin remains dry. Return to oven and cook for 1 hour and 15 min, until tender.

Remove from the oven, and leave to rest in a warm place for 15 min, before cutting the meat into square bites, or slices. Serve while hot.

Method BBQ:
Note, this is a guideline only. Correct cooking on bbq is highly dependent on a number of factors such as the size of the bbq, the type of coal / briquettes, the placement of the roast, etc. The most important thing to remember is to check the roast often and to turn the meat to ensure even cooking.

We have used a medium-sized kettle bbq with lid.

Fill two coal trays with briquettes (it is advantageous to use briquettes and not charcoal as they hold the heat longer) and place on each side of the BBQ, leaveing a space in the middle that the roast can sit over. Place a foil tray between the coal trays (underneath the roast), to catch meat juice so that it doesn’t drip into the embers, and either causes flames or makes the BBQ difficult to clean. Light the briquettes and put a rack over to cover the entire grill. Wait for the briquettes to burn down until they are fiery red, very hot and with quite a low flame.

Place the roast on the rack, skin side up, over the drip tray between the coal trays, and roast for 45 minutes – 1 hour. Check often.
Rotate the roast occasionally to make sure it is cooking evenly on all sides, and always position with the skin side up.

For crispy crackling, turn the roast sideways, with the cracklling facing one of the coal trays, a little closer to one of the trays to expedite the process, keep an eye out, it burns easily! The crackling is done when it’s bubbled up and crispy all over. Total cooking time approx. 1-1.5 hours. Remove the roast from the heat and rest for 15 minutes. Carve and serve while hot.

Cooking with Salt. Pork Belly in Brine with Crispy Crackling. Recipes, foodstyling, styling & photography by Manja Wachsmuth

This recipe is part of my salt story published in Matmagasinet Nord #23 2017, focusing on using salt as a main ingredient for cooking or flavouring. Try these recipes from this series too:
Blackberry Grav Lax
Salt & Vinegar Potato Skins
Salt Dough Baked Leg of Lamb
The Perfectly Salty Margarita
Oozy Salted Chocolate Caramel Tart
Salted Caramel Ice Cream
Golden Pavlova with Summer Berries and Salted Chocolate Sauce

© Manja Wachsmuth 2017

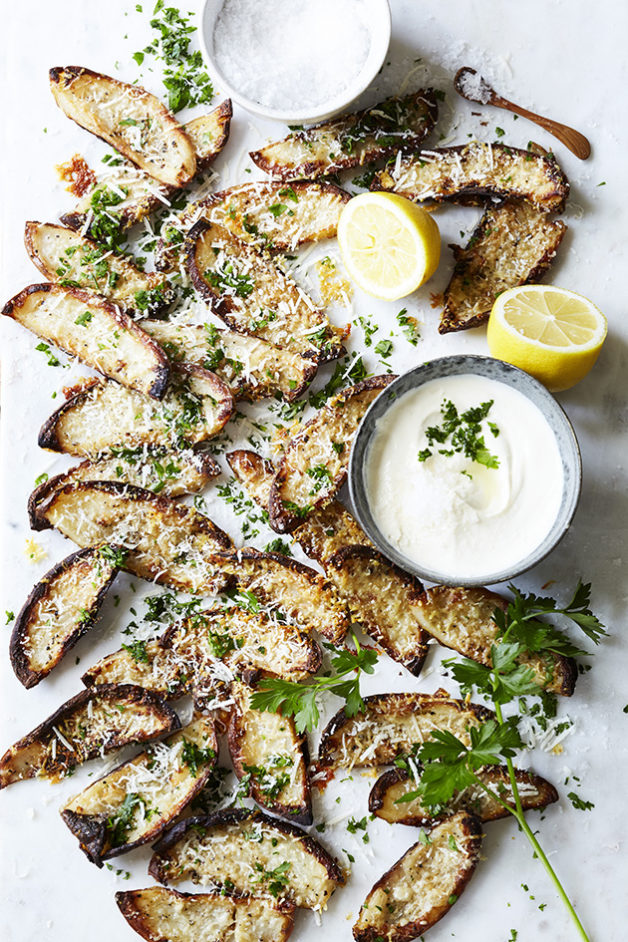
Crispy Salt and Vinegar Potato Skins

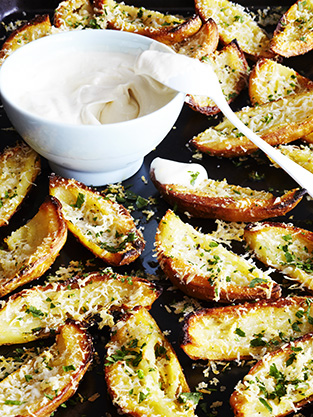
Salt and Vinegar Potato Skins with Tahini Dressing. Cooking with Salt. Recipes, foodstyling, styling & photography by Manja Wachsmuth

SALT AND VINEGAR POTATO SKINS WITH TAHINI, SOUR CREAM DIP
Serves 4-6

These salt and vinegar potato skins are inspired by the kiwi obsession with the salt and vinegar flavour combination on potato chips. Very crispy, salty and tangy and VERY DELICIOUS!

8 medium sized Potatoes
1/4 cup / 75 ml White Wine Vinegar
Extra Virgin Olive Oil for brushing
50 g Parmesan Cheese, grated
Freshly ground Black Pepper
1 handful Italian Parsley, finely chopped
5 tsp Sea Salt

Tahini Sour Cream Dip:

225 g Sour Cream/ Crème Fraiche
2 tbsp Tahini
Lemon Juice from 1 lemon
1 tsp Sea Salt

Method Salt and Vinegar Potato Skins:

Preheat oven to 250ºC.

Wash the potatoes and cut into halves. Place on baking paper on a baking tray and bake in the oven for 45 min until just tender, but still firm. Set aside to cool. Scoop out the flesh into a bowl, leaving ½ cm thick shell. The potato flesh may be set aside for another use (mash). Lightly score the interior of each potato with a fork and brush generously with vinegar, allowing the flavours to soak in.

Preheat oven to 250ºC grill.

Brush the potatoes with olive oil and season generously with salt and a little ground pepper. Place the potato skins, skin side up, on a baking tray and place under the grill in the oven and cook for 2-3 minutes, making sure they don’t burn. Turn the potatoes over and grill for another 5 minutes. During the last few minutes of grilling, sprinkle each potato with Parmesan and grill until melted. Garnish with Parsley and serve the Salt and Vinegar Potato Skins while hot, with Tahini Sour Cream Dip.

Method Tahini Sour Cream Dip:

Mix sour cream, tahini, lemon juice and a generous sprinkle of sea salt in a bowl. Set aside to cool in the fridge before serving.

Enjoy!

This recipe is part of my salt story published in MAD&venner #129 2015 & Matmagasinet Nord #23 2017, focusing on using salt as a main ingredient for cooking or flavouring. Try these recipes from this series too:
Blackberry Grav Lax
Pork Belly in Brine with Cripsy Crackling
Salt Dough Baked Leg of Lamb
The Perfectly Salty Margarita
Oozy Salted Chocolate Caramel Tart
Salted Caramel Ice Cream
Golden Pavlova with Summer Berries and Salted Chocolate Sauce

© Manja Wachsmuth 2017

Blackberry Grav Lax

Salt recipes Salt recipes Salt recipes Cooking with Salt Cooking with Salt

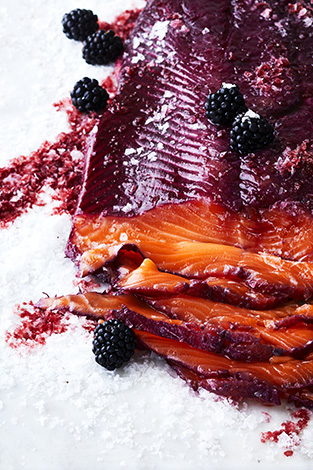
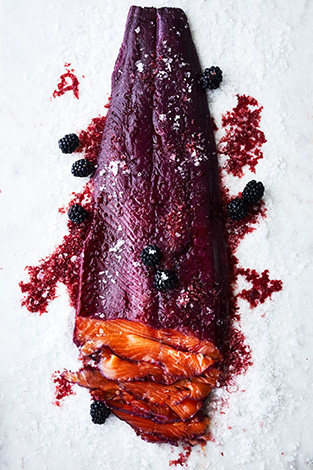
BLACKBERRY GRAV LAX
Serves 8-10

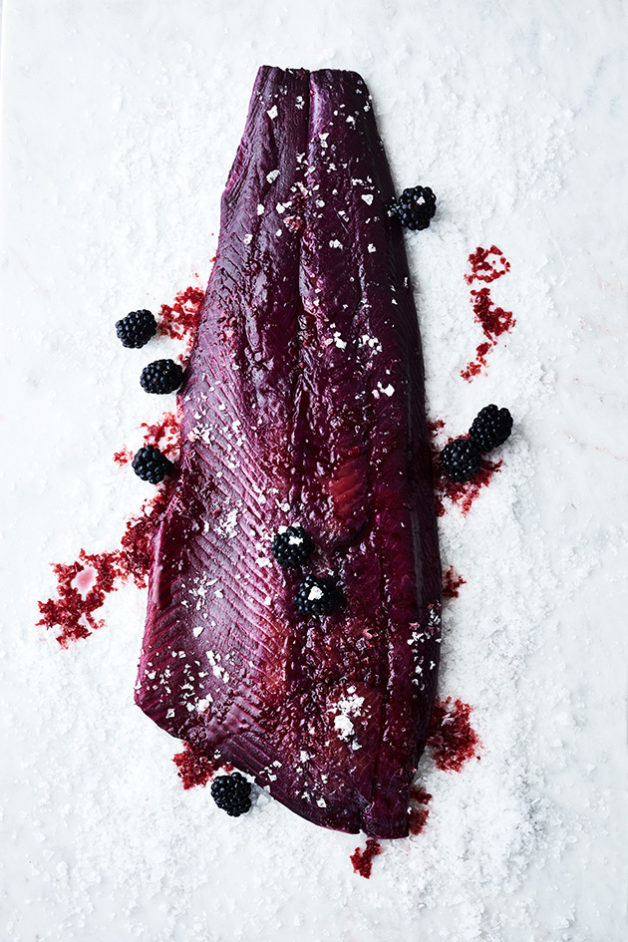
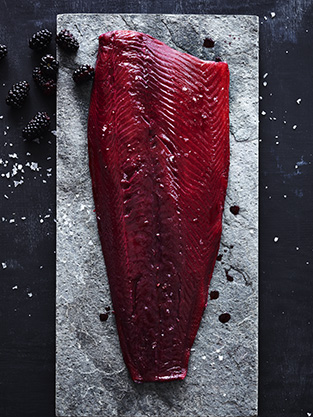
In this Grav Lax recipe salt, in combination with the sugar, alcohol and fruit is used to draw moisture out of the flesh and preserve the fish. Giving it a lovely smooth texture and a very slight salty taste. The traditional Scandinavian Grav Lax, has had an overhaul with blackberries, creating a stunning fillet, that looks great on your smorgasbord.

1 kg Salmon Fillet, skin on, pin boned
½ cup/70g Sea Salt Flakes
¼ cup Raw Sugar (weigh)
2 tsp Heilala Vanilla Powder (seeds from 2 vanilla pods)
2 tbsp freshly ground Pepper
3 cups/ 400 g Frozen or fresh Blackberries
1/3 cup/ 1 dl Snaps
2 tbsp fennel seeds

Horseradish Dip:

Horseradish cream
Sour cream
Salt & Pepper to taste

Serving:

Rye Bread
Micro greens (coriander & beetroot sprouts or watercress)
Lemon rind
Blackberries

Method Grav Lax:

Place sea salt, sugar, vanilla powder, pepper, blackberries, snaps and fennel seeds in a food processor or blender, and blitz to mix.

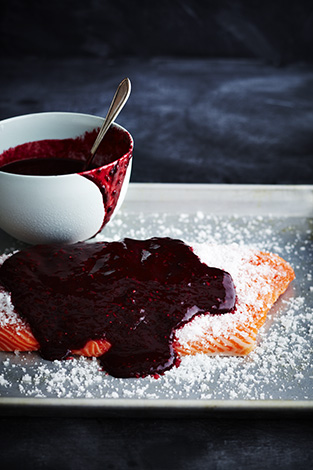
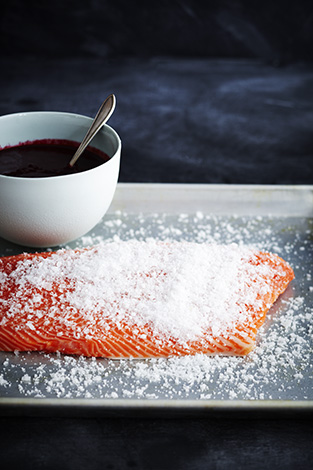
Place the salmon skin side down on several layers of cling film, (enough to wrap around and cover the salmon), and place on a baking tray. Using tweezers, remove the pin bones along the side of the salmon fillet. Spread the salt and blackberry mixture over the fish, making sure it’s completely covered. Then wrap the cling film tightly around the salmon. Place a second baking tray or chopping board over the fillet and weigh it down with a heavy item (Weighing the fish down, is not usually part of traditional Swedish curing technique, however it’s often used in Southern Hemisphere cooking, to help draw moisture out. This technique may give the fish a tougher texture).

Refrigerate and cure for at least 24 hours, up to 48 hours.

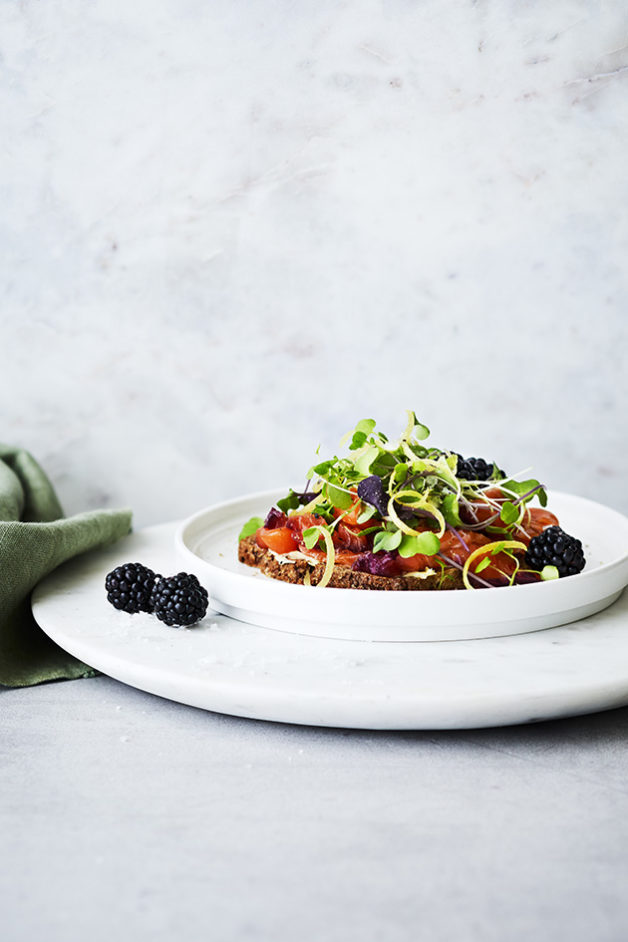
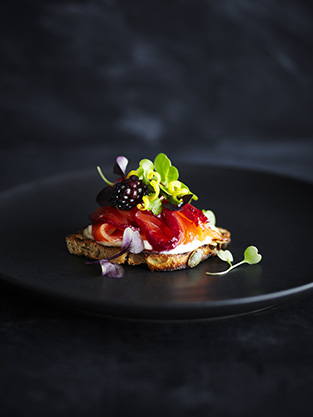
Remove the cling film and clean the seasoning mixture from the salmon with a wet teatowel. Avoid rinsing the filet, under the tap, as this will rinse out the beautiful red colour. Serve thinly sliced on toasted rye bread, garnish with micro herbs (ie coriander & beetroot sprouts or watercress), lemon rind, blackberries and horseradish dip (see method below).

Method Dip:

Mix horseradish cream and sour cream, evenly 50/50 and season with sea salt and pepper to your liking.

The Grav Lax will keep 3-4 days, chilled.

Cooking note: It is important to use sea salt crystals and not rock salt, as flavour and texture will vary greatly.

Salt recipesSalt recipes Salt recipes

This recipe is part of my salt story published in MAD&venner #129 2015 & Matmagasinet Nord #23 2017, focusing on using salt as a main ingredient for cooking or flavouring. Try these recipes from this series too:
Salt & Vinegar Potato Skins
Pork Belly in Brine with Cripsy Crackling
Salt Dough Baked Leg of Lamb
The Perfectly Salty Margarita
Oozy Salted Chocolate Caramel Tart
Salted Caramel Ice Cream
Golden Pavlova with Summer Berries and Salted Chocolate Sauce

© Manja Wachsmuth 2017

Salt

Salt recipes

Over the years, I’ve developed a bit of an obsession with salt. Ever since my shoot at Læsø Salt, I’ve been testing recipes, using salt as a main part of the dish. Wether it be preserving, a cooking technique or just adding a salty flavour to the food. The whole thing has been quite an experience, entering the world of recipe writing! I’ve been fortunate enough to have my salt recipes published in the current summer issue of NORD magazine along with my article about Læsø Salt Works.

Below follows the unedited version of the article, and over the next few weeks, I’ll share a series of blog posts, with my salty recipes:

BLACBERRY GRAV LAX
ZINGY MARGARITA & PINK GRAPEFRUIT MARGARITA
SALT & VINEGAR POTATOSKINS WITH TAHINI, SOUR CREAM DIP
PORK BELLY IN BRINE WITH CRISPY CRACKLING
SALT DOUGH LEG OF LAMB
SALTED CHOCOLATE AND CARAMEL TART(S)
GOLDEN PAVLOVA WITH SUMMER BERRIES AND SALTED CHOCOLATE SAUCE
SALTED CARAMEL ICE CREAM (you’re gonna wanna check back for this one…)
Cooking with Salt Cooking with Salt Cooking with Salt Cooking with Salt Cooking with Salt Cooking with Salt Cooking with Salt Cooking with Salt

COOKING WITH SALT
Salt has been used for cooking for thousands of years, in many cultures around the globe. Before the invention of the refrigerator, salt has been one of the most important preservation methods of meat and fish and as one of the 5 main flavors (sweet, sour, salty, bitter and umami), salt is an important and recognizable part of our daily life when it comes to cooking.

The modern day’s introduction of ready-made foods and fast food has given salt a really bad reputation. However, there are many ways to utilize the salt’s good qualities in the kitchen to preserve, slowcook or give untraditional taste in the sweet kitchen.
Laesoe Saltsyderi Laesoe Saltsyderi Laesoe Saltsyderi Laesoe Saltsyderi Laesoe Saltsyderi Laesoe Saltsyderi

A TRULY IDYLLIC PLACE!
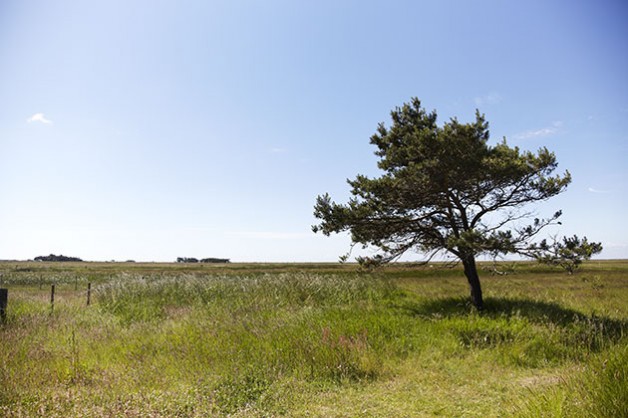
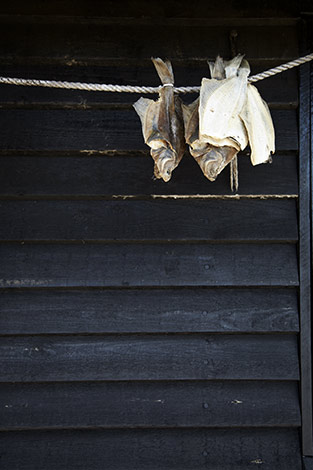
We are on the island of Læsø in Denmark. Læsø is a small island in Kattegat, just off the east coast of the peninsula Jutland, Denmark. Half an hour sailing from Frederikshavn you will find this idyllic island, also called the gem of Kattegat. When you leave the ferry (or almost already when boarding) you know that you are on island time. It is quite a wind blown place but also peacefull. It is filled with nostalgia and the passing days of old Danish fishermen and village charm. This is really the outskirts of Denmark, but if you feel stressed, you’ve come to the right place: Here you can relax!

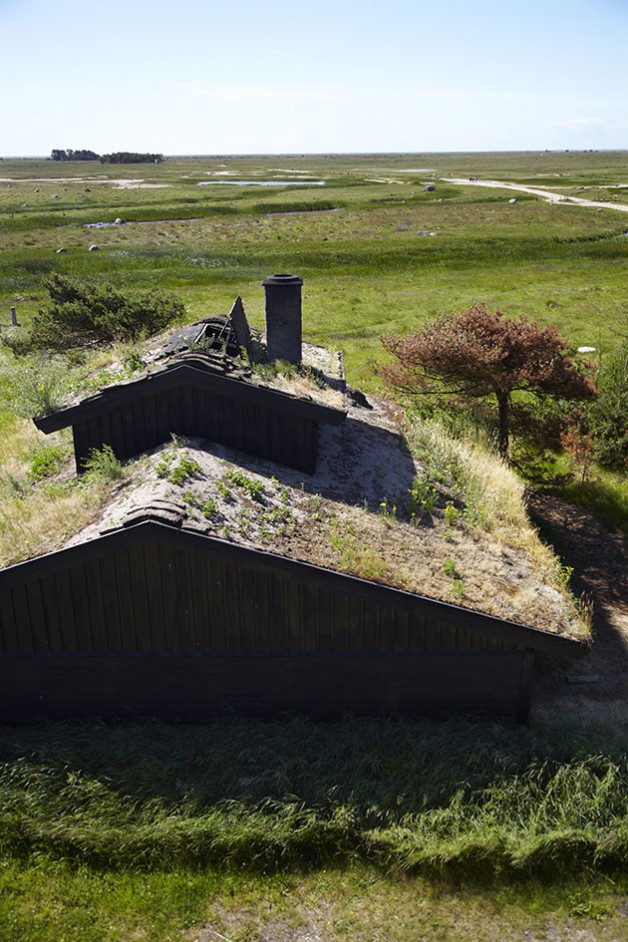
The island has a fantastic and unique nature and you will find the beauty in the little things. The island is known for its scampi festival in August and the cute timbered houses with seeweed roofs.

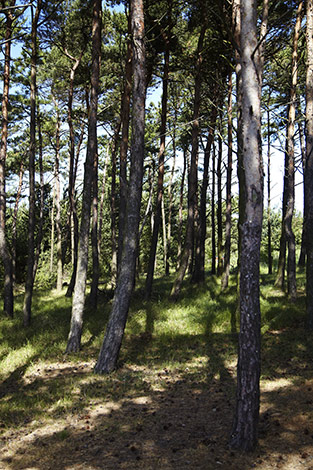
On the edge of a pine forest, south of Byrum, bordering the open part of the truly windy parts of Læsø lies Læsø Saltworks. It is both a place where they make Læsø Salt, but also a tourist attraction that in a very gripping way, tells the story of life on Læsø in the past and gives a living sight of how to make salt.

The salt they make here more than measures up to some of the world’s leading salt brands and I would venture to say it’s something very special. Due to the high concentration of salt in the sea around Læsø (up to 14%, against normal 2-3%), the sea salt has been harvested on Læsø since the Middle Ages, but later died due to shortage of fire wood and sand drift.

Back in 1990, when archaeologists began studying the history of Læsø, the idea of ​​salt seething on Læsø was revived with the discoveries made by the archaeologists. Today the salt is made according to the old traditions and recipes.

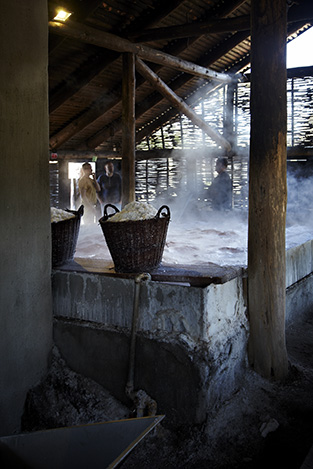
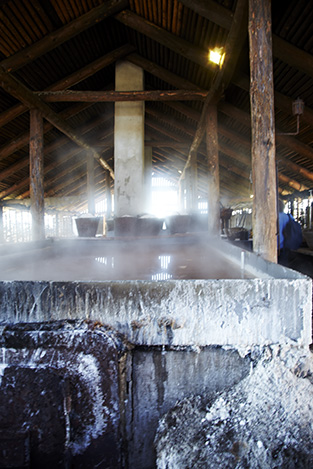
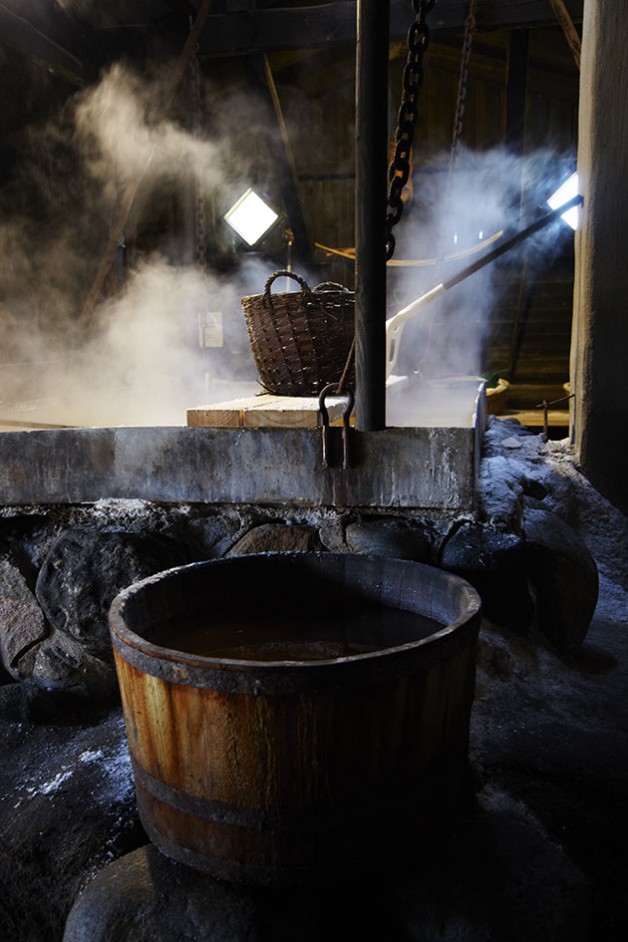
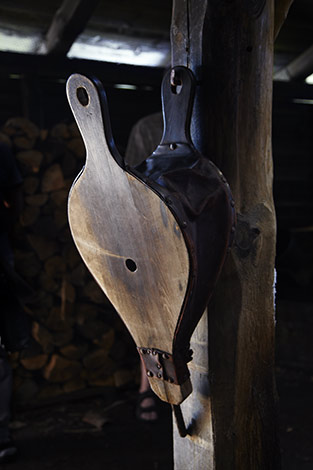
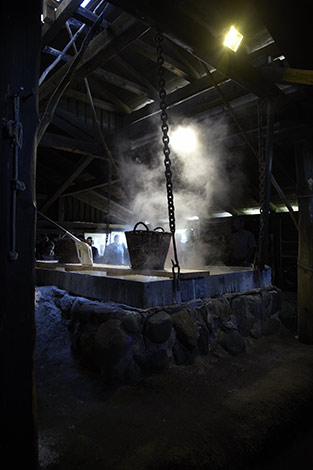
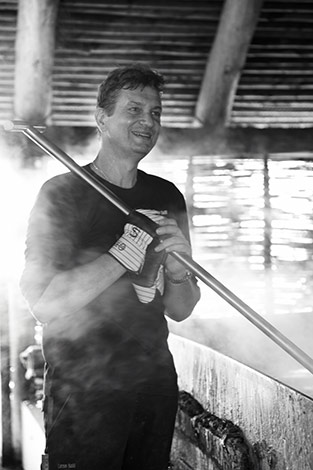
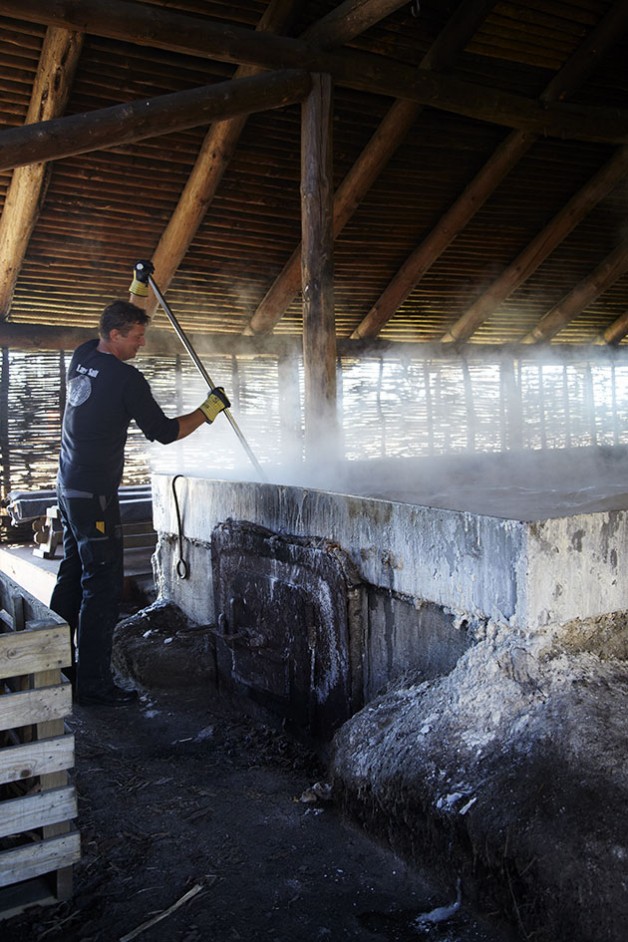
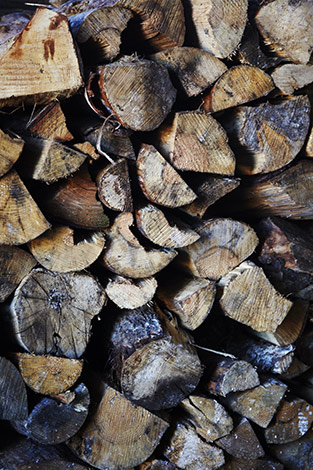
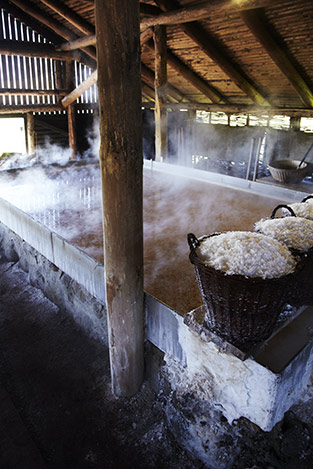
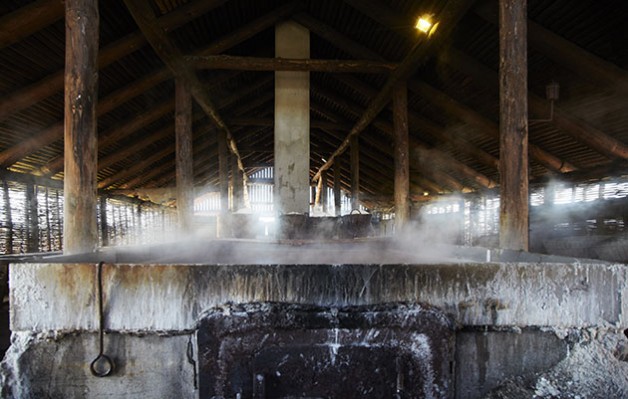
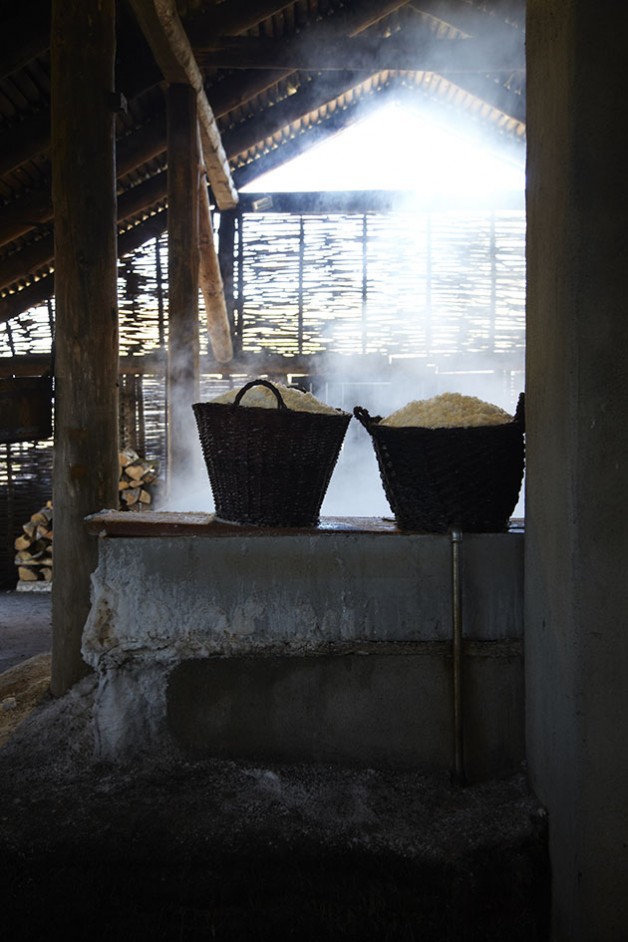
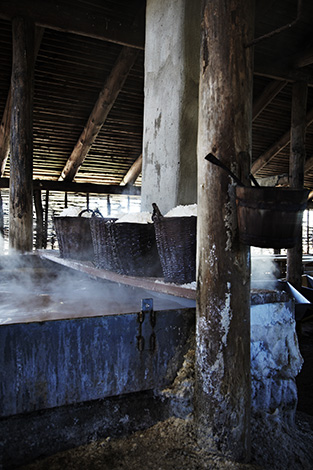
Entering the seething room, it’s warm, humid and dark. The only light is a lamp over the huge seething pan, as well as a bit of daylight flowing under the grassy roof and the open doorway. It’s almost like going straight back into the Middle Ages. This is how the seethery looks. It is designed from archaeologists’ findings of the original salt works, which lay here hundreds of years ago. Saltwater is taken from wells, dug into the lowest parts of southern Læsø and in the saltworks the water is set to evaporate in large pans over open fire. The big pans look like a huge bathtub, with steamy water, as you imagine it would look like in a movie about the wild Northmen from the 16th century.

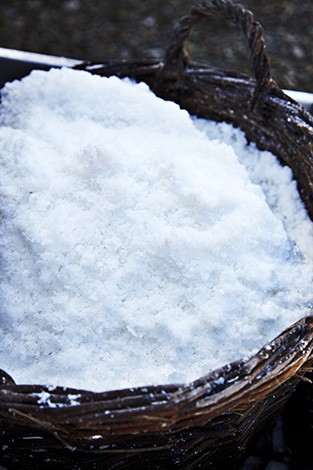
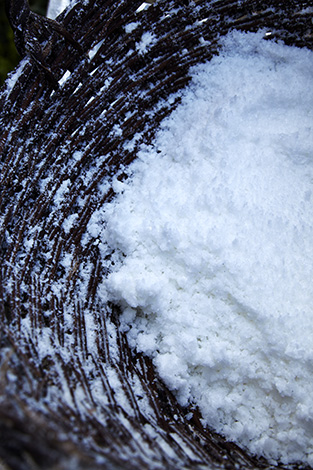
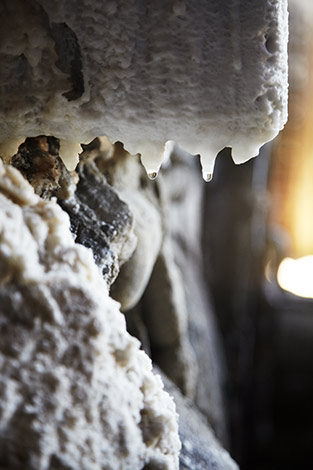
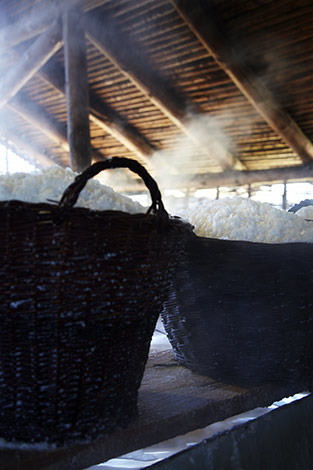
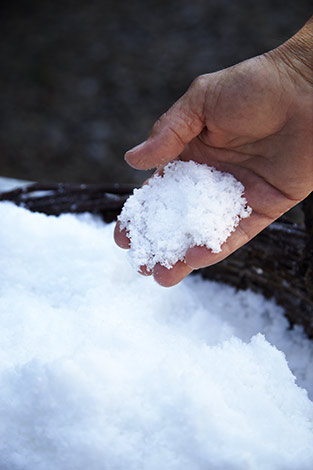
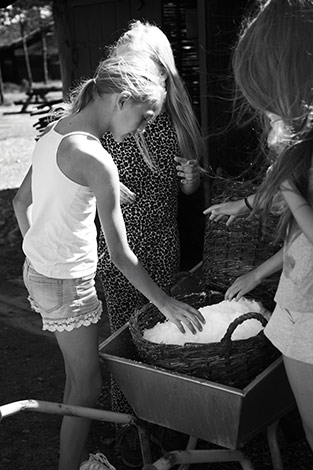
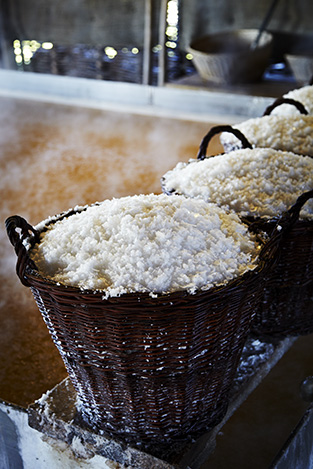
When the salt layer is saturated, the salt crystals are formed on the surface and poured into baskets where the residual water runs off before the salt is added to drying on the drying ceiling. The salt is handmade with respect for nature’s surroundings on the island, and they also give a demonstration of how to sethe salt yourself.

All by-products of the process are used for the Læsø Salt Care skin care series and are excellent treatment for people with dry skin or psoriasis. The salt retains many of its natural minerals such as calcium and magnesium and has a rich flavour. It is porous enough to crush between two fingers. Læsø Salt is the preservation of a lost art and pride and a tasty and beautiful product that is good for many types of cooking, not just to sprinkle over an egg. A visit here inspires a desire to retrieve cooking methods of a bygone era using salt dough for long-term cooking and cure salmon in a new way, as well as exploring salt in the sweet kitchen. One of nature’s most exciting taste contradictions with a lingering selection of salty sweet sensations. From irresistible caramel ice cream to decadent chocolate tart and sweet pavlova, it’s hard to resist this winning combination.

You can check out more of my images from Læsø Salt Works here. And read more about what else to do on Læsø, here & here
 

Nordic Sea Salt

Læsø Saltsyderi Læsø Saltsyderi Læsø Saltsyderi Læsø Saltsyderi Læsø Saltsyderi Læsø Saltsyderi Læsø Saltsyderi Læsø Saltsyderi Læsø Saltsyderi Læsø Saltsyderi Læsø Saltsyderi Læsø Saltsyderi Læsø Saltsyderi Læsø Saltsyderi Læsø Saltsyderi Læsø Saltsyderi Læsø Saltsyderi Læsø Saltsyderi

If you’ve worked with me in my studio, or just gotten to know me, while I’ve been in New Zealand,  you might have been so lucky to recieve as a present, a cute little linnen bag, tied with a piece of string and filled with pourus sea salt crystals, along with an attempt from me to explain why this salt is awesome!

You might have thought:  “Wow, how awesome can salt be?” or “I thought Maldon salt was supposed to be the awesome salt!” Well Maldon salt is awesome, and I know the “REAL” salt to use if you are a chef or a real foodie. But Maldon, move over, because here’s the story and the images to show, why I think Læsø Salt is more awesome.

As a visual person, I buy with my eyes (not everything and always, but often). A product has got to look good or sell me the idea of looking good. Well for starters Læsø Salt does just that. Just take a look at the place where they make it!
It is full of beautiful photo opportunities, and if my dad hadn’t been hanging around, waiting for me to finish “doing my thing”, I could have spent the whole day here. Although I think I got some pretty cool shots after all.

We are still on the island Læsø, as I wrote about the other day and the first visit on my itinerary of the day. At the edge of a pine forrest, south of the town Byrum, bordering the open plain of the the truly windblown parts of Læsø, lies Læsø Salt Works. It is both the place where they make Læsø Salt, but also a tourist attraction that tells a lot of the story on life on Læsø back in the day. Without making it too long and boring (the guides at Læsø Salt does not), I’ll try to explaing why this place, and the salt, is so special.

Due to the high concentration of salt in the sea around Læsø, the making of sea salt has been happeing on Læsø since the middel ages, but then since died out. Back in 1990 when archeoligists started looking into some of the history of Læsø, the idea of salt seething on Læsø was brought back to life using the discoveries the archeologists made. Today they seethe salt after the old traditions and recipes and make just enough to meet demands and keep Læsø Salt Works a healthy business.

The salty water is brought in from wells, dug in the lower parts of southern Læsø. In the Salt Works the water is set to evaporate over the fire. Once the brine is saturated, the salt crystals form on the surface and is scooped up into the baskets where residue water runs off, before the salt is set to dry in the drying addic.

The salt still retains a lot of the minerals and has a full-bodied flavour. It is porous enough to be perfect for crushing between two fingers before seasoning any dish. The salt is hand made and with respect for the nature sourroundings of the island. All biproducts of the seething is used for Læsø Salt Care scin care range and is excellent treatment for people with dry skin or pshoriasis. So apart from the oddness in bringing sea salt across the globe to New Zealand, Læsø Salt meets a lot of my criteria for many products that I buy. I like to support: My local community, the preservation of a lost art, AND pride and effort into making a tasty and beautiful product.

Read more about Læsø Salt Works in English here and in Danish here. Stay tuned for another awesome place to visit on Læsø, soon!