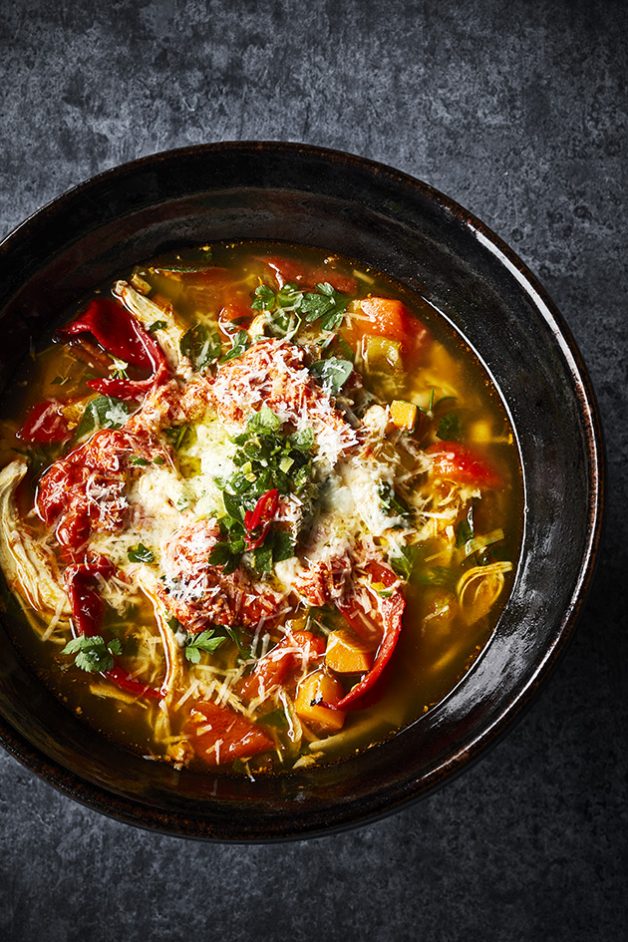
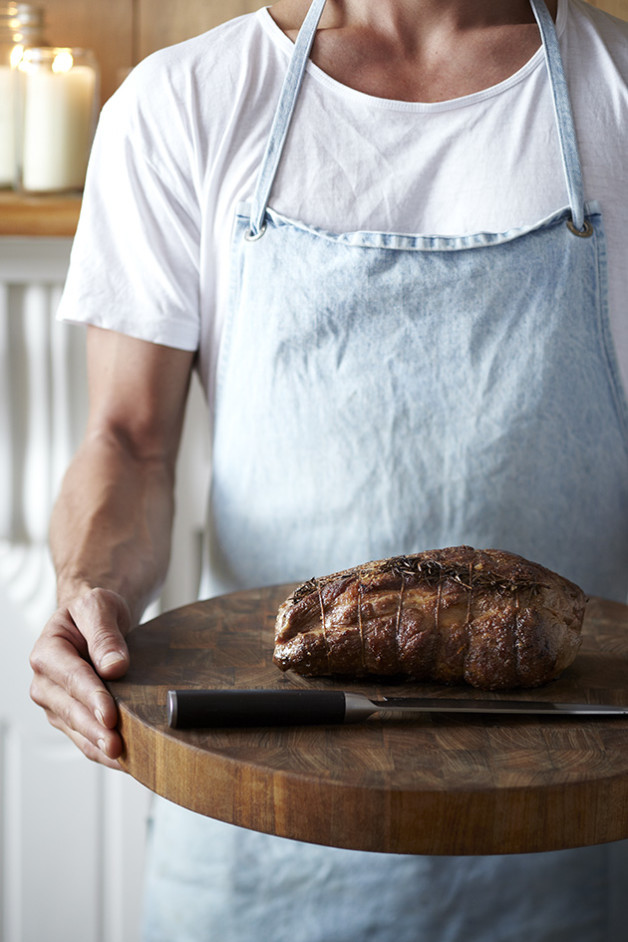
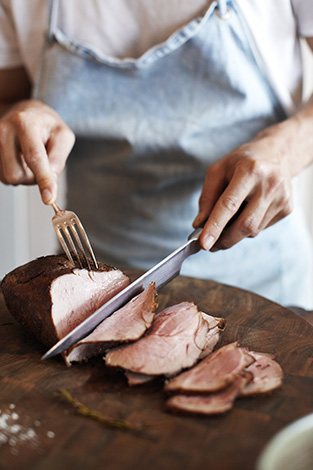
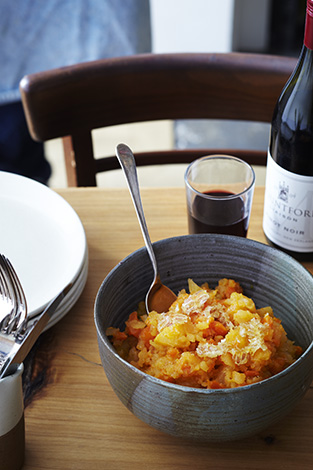
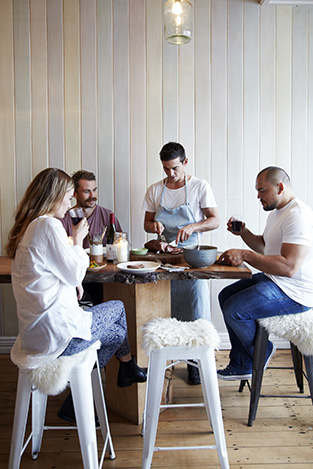
Chicken Stock Soup

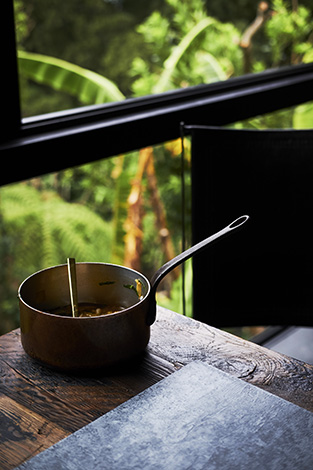
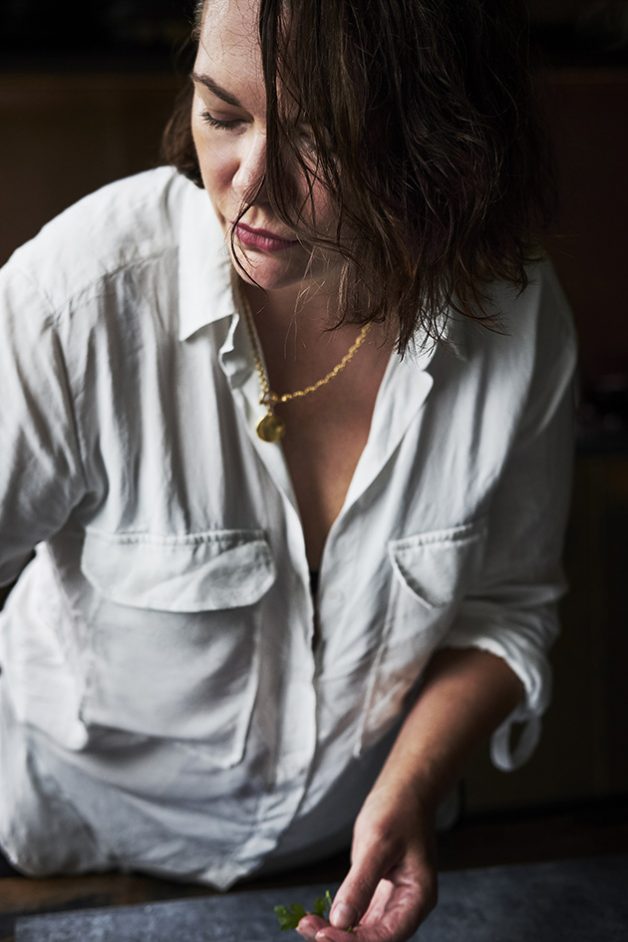
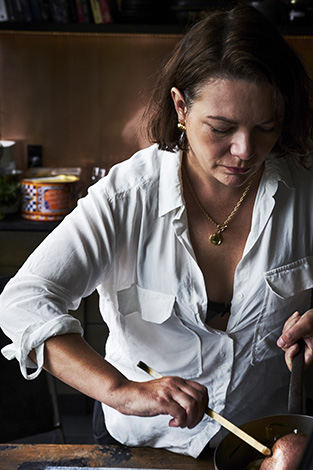
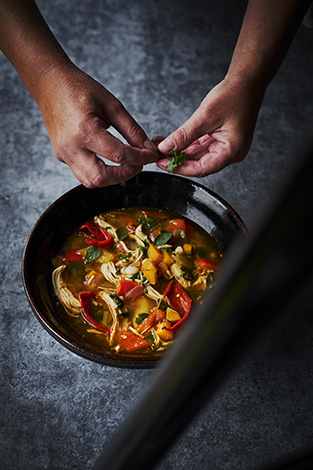
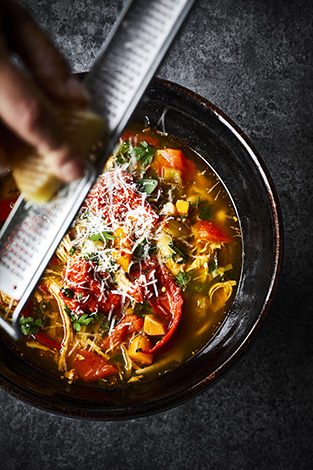
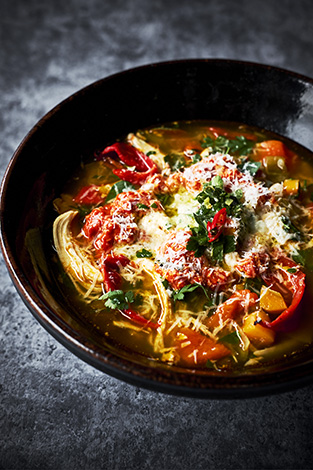
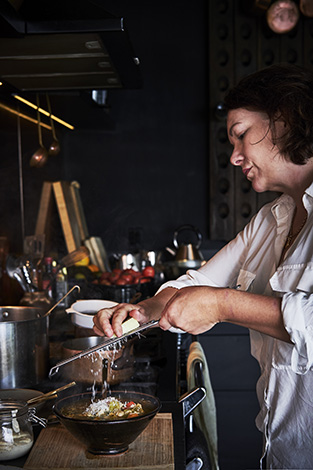
This is my chicken stock soup, as I made it after shooting Sarah Ginella’s (Barulho) delicious chicken stock soup above. I didn’t get her recipe, but managed to sort of make my own, in the “a little bit of this” and “a little bit of that” kinda way, based on her instructions and what I could taste in it.
Serves 4-6 people, or a family of 4 (2 adults and 2 small kids) twice. Freezes well.

1 whole organic chicken

Whatever veges you have in your pantry.
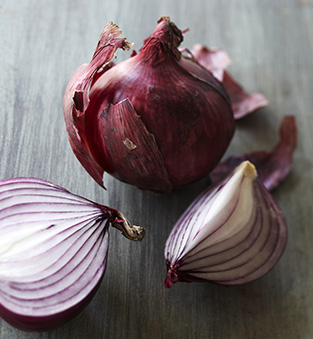
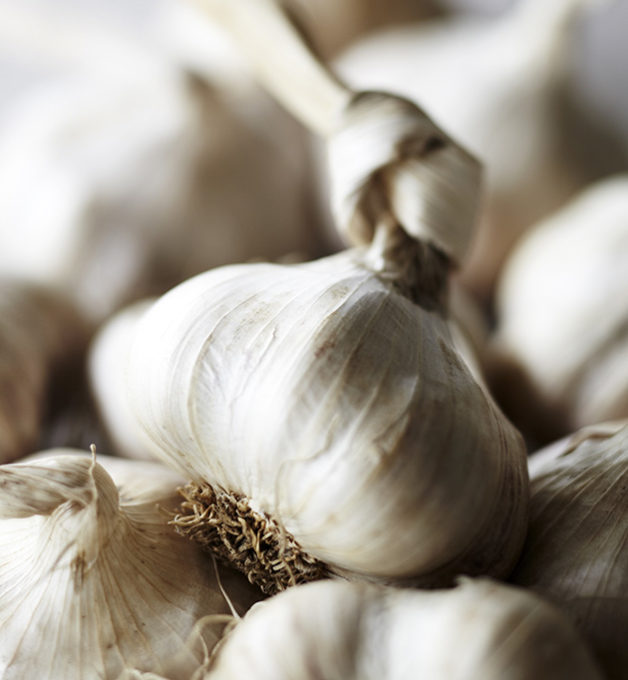
I use 1-2 carrots, 1-2-3 stalks of celery, 1-2 potatoes, 1 large onion, 2-3 cloves of garlic
You could also use, celeriac, swede, beets etc.

Whatever veges you have in your fridge/ fruit bowl.
I use capsicums, tomato, mushrooms (if I have any), zucchini etc.

Herbs from the garden
Ie parsley, thyme, rosemary, bay leaves.

1 tin of beans (kidney beans, berlotti beans or butter beans etc)
1 cup of rice/ noodles/ orzo/ other carby pantry stable, cooked as per packaging instructions
Miso paste
Paprika
Tomato paste
Neudorf mushroom salt
Soy sauce or fish sauce
Fresh oregano to garnish
Parmesan cheese

Make sure the chicken is clean inside and out. I always chop the bum off. Chop all veges into bite size pieces. I have small kids, so I chop it all into quite small pieces. You might prefer yours a bit chunckier.

Place the chicken in a large pot (4-5 litres) along with the veges from your pantry (root veges, celery etc) and herbs and cover with water. Cover with a lid and bring to the boil. Then turn the heat down and let the chicken simmer at low heat with a lid on for 2,5 – 3 hours until tender. At this stage the meat should be falling off the bone. With a large spoon & spatula gently remove the chicken from the pot and place on a chopping board and peel all the chicken from the bone and return the meat to the pot. Discard the carcass. I often save the chicken breasts to use for another dish, but it can be returned to the stock with everyting else.

Take out any stalks from herbs that are too tough to eat, ie rosemary stalks, thyme stalks and bay leaves. I don’t remove the veges. If soup has been simmering on low heat, these should be tender but still have bite, and fine to eat. Add the remaning veges, a tin of beans to the pot as well as any pre-cooked rice or pasta/ orzo and bring to the boil again, then let simmer for 3-5 minutes to tenderize the rest of the vegetables and heat through the beans.

To flavour the soup use 1-2 teapoons of miso paste, 1/2-1 teaspoon of Neudorf mushroom salt (Nicola Galloway gave this to me once. After about a year in the pantry I discovered it adds a wonderful umami to any sort of bland tasting dish or sauce, brilliant), a dash of paprika (smoked paprika is wonderful), a table spoonful or 2 of tomato paste and lots of salt and pepper. You can also use fish sauce, soy sauce, some leftover tomato based mexican style salsa or any other sort of pesto or sauce you might have in the fridge. I’d avoid anything dairy based. I’ve tried to add tzaziki, but that was a tad weird.

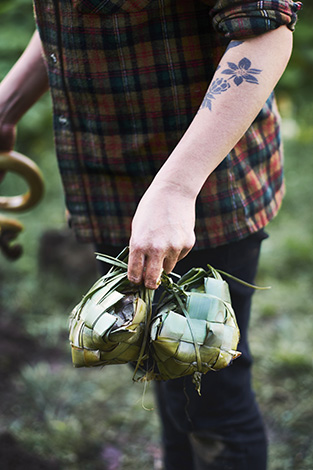
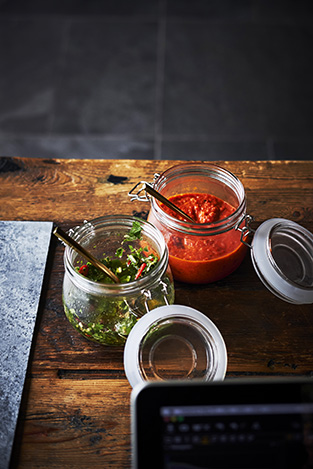
Serve chicken stock soup in bowls, garnish with fresh oregano and plenty of grated parmesan. Sarah also had some wonderful romesco sauce and what I think might have been a salsa verde or chimichurri to dollop on top.

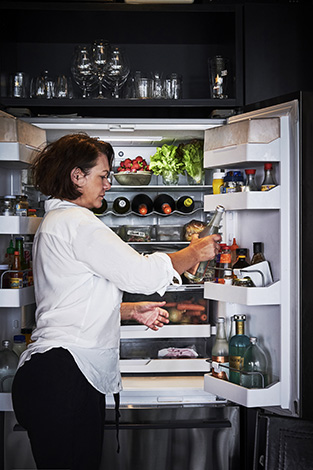
I did this shoot with Sarah Ginella and her Chicken Stock Soup for my Mother Chef project whilst Sarah was talking to me about the importance of preparation to be able to make good, nutritious food choices. You can view more of the project here, on my website. Make sure to check other of my recipes on this blog, ie my pork belly with crispy crackling.


Monique Fiso and Hiakai

In the beginning of last year, I started seeing the name of this young chef pop up all over the place online and in print media.
Monique Fiso, a chef with a strong vision to explore Māori food and native New Zealand ingredients and turn it into fine dining. I felt really drawn to her passion and vision and her focus reminded me of what had happened with the food scene in Denmark, my home country 10-15 years ago. I wanted to tell her story, so I contacted Monique Fiso to see if she’d be keen to work with me.

Together we created an article for the Norwegian food magazine Nord (read article below), and the beginning of a body of photos that would later turn into many other things. Not just one magazine article but 2, a museeum exhibition (as some of the images will be exhibited this October at MOTAT, Aucklands Museeum of Transport and Technology as part of a bigger exhibition about Innovators and the work Monique Fiso has done with her restaurant concept Hiakai), a tiny feature in a Netflix show (as one image gets displayed in the bio about Monique Fiso, that features in the show) a calendar for year 2020 and a book (a much bigger body of work, which will be published next year), and who knows, maybe more…

During the time we have worked together, Monique Fiso has given me an incredible and invaluable view into native New Zealand food culture, and Māori cuisine. Something I didn’t pay much attention to before I met her. I view her work as something hugely important for the New Zealand food and restaurant scene, but also for NZ food tourism, general NZ culture and identity. She has hugely contributed to putting the New Zealand restaurant scene on the world map (and continues to do so), and I really admire her strong vision and ability to stay true to her purpose. Few people work as hard as her.

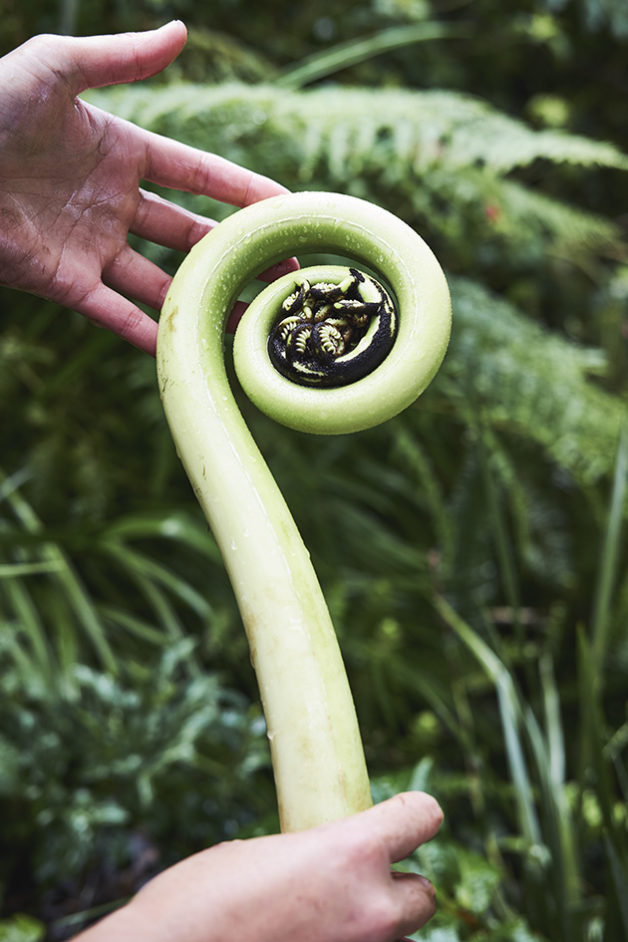
Moique Fiso foraging native plants for her Hiakai pop up dinner by Monique Fiso. Food; Cooking; Food photography; Food photographer; Eat, Hiakai, Maori Food, Native Cooking, New Zealand, Foraging, Hangi
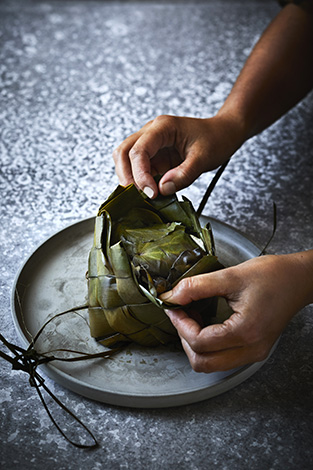
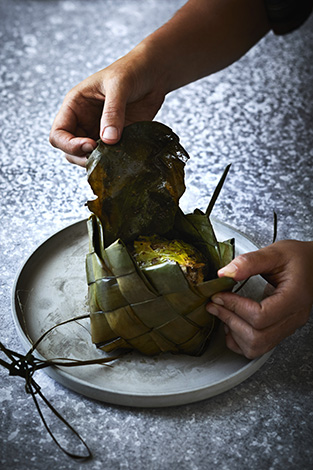
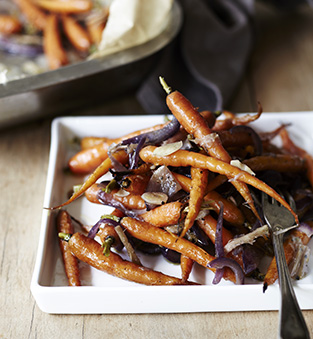
Hangi Cooked Chicken with Root Vegetables and Maori Potatoes. Hiakai Winter Menu by Monique Fiso. Recipe and food styling by Monique Fiso. Styling and photography by Manja Wachsmuth. Hangi Cooked Chicken with Root Vegetables and Maori Potatoes. Hiakai Winter Menu by Monique Fiso. Recipe and food styling by Monique Fiso. Styling and photography by Manja Wachsmuth. Hangi Cooked Chicken with Root Vegetables and Maori Potatoes. Hiakai Winter Menu by Monique Fiso. Recipe and food styling by Monique Fiso. Styling and photography by Manja Wachsmuth. Hangi Cooked Chicken with Root Vegetables and Maori Potatoes. Hiakai Winter Menu by Monique Fiso. Recipe and food styling by Monique Fiso. Styling and photography by Manja Wachsmuth.

Q&A with Monique Fiso, Hiakai
As published in Nord Magazine #24 Sep 2017
By Manja Wachsmuth

(Please note, that this Q&A was written in June 2017, thus many things, including Monique, has developed a lot since then. I’ve chosen to keep this as it was originally written, as a contrast to where Monique is at today with her vision.)

The New Zealand food scene is diverse and influenced by many cultures. Often referred to as Pacific Rim cuisine, almost all corners of the Earths most celebrated cuisines can be found in plentiful here. But something is happening under the radar. Similar to what happened to the Nordic Food scene when Rene Redzepi and Claus Meyer started Noma and founded the New Nordic Food manifesto. Several chefs and restaurateurs are starting to look closer at their own backyard, and what they can find in the native bush of The Land With The Long White Cloud. Up and coming, much celebrated in New Zealand, young chef Monique Fiso, is at the forefront of this foodie movement with her engagement in bringing Māori Cuisine back on the map.

Hiakai pop up dinner by Monique Fiso Hiakai pop up dinner by Monique Fiso, The Hiakai dinner tent.

What is your background as a chef and how does it relate to your cultural background?

I’ve been cooking professionally for 13 years, most of which has been in Michelin starred kitchens in New York City. I didn’t grow up knowing much about my culture at all, mainly because I was discouraged from doing so. New Zealand in the late 80’s and 90’s wasn’t as “Māori friendly” as it is today, there was a lot of racism so I grew up being told to act as Pakeha (White European) as possible if I wanted to get anywhere in life. I know a lot of Māori of my generation who grew up in this way also. It causes a lot of self-hate and depression in many of us. It wasn’t until my mid twenties that I started to explore my Māori heritage.

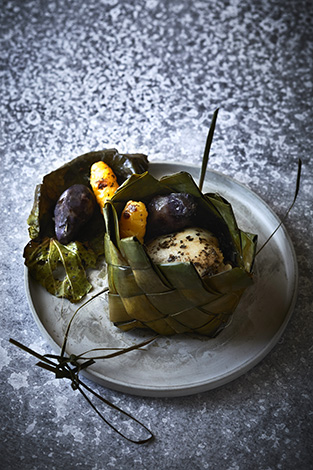
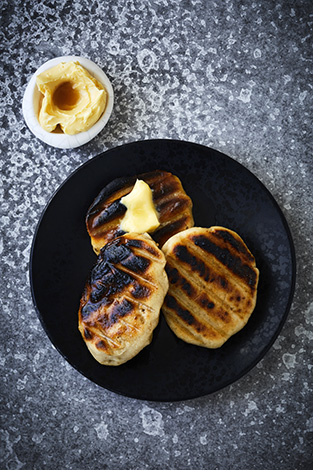
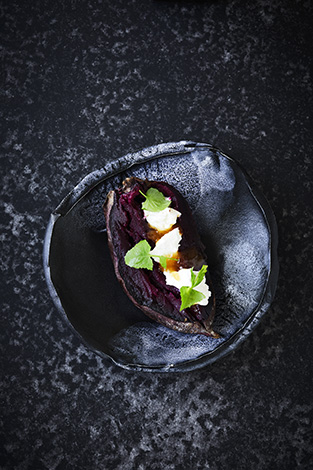
Rewena Flatbread and Tītī Fat Butter. Hiakai Winter Menu by Monique Fiso. Recipe and food styling by Monique Fiso. Styling and photography by Manja Wachsmuth. Charred Kumara with Goats Cheese, Manuka Honey & Puha. Hiakai Winter Menu by Monique Fiso. Recipe and food styling by Monique Fiso. Styling and photography by Manja Wachsmuth.

Tell us a bit about Hiakai

Hiakai is a pop up series devoted to the exploration and development of Māori cooking techniques and ingredients. I started Hiakai because I really wanted to challenge the status quo on Māori Cuisine. People had this view that Māori cuisine is limited or unsophisticated and that it isn’t possible to integrate Māori cooking techniques or ingredients into a fine dining experience. I’m happy to say that Hiakai has blown that notion out of the water and now a lot of restaurants are integrating more elements of Māori food and culture into their business. Hiakai launched in June 2016 and quickly established itself as a leading innovator in the New Zealand food scene, while also helping play a huge role in keeping traditional Māori food culture alive.

What is a Hāngi (explain to someone who wouldn’t have seen it or heard about it before), and how to do a Hāngi at home?

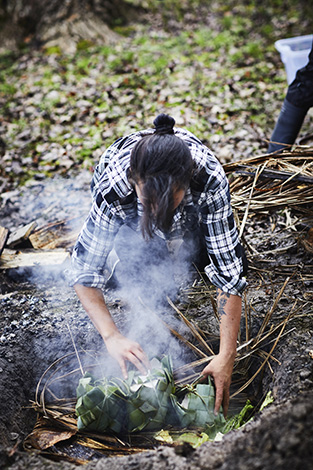
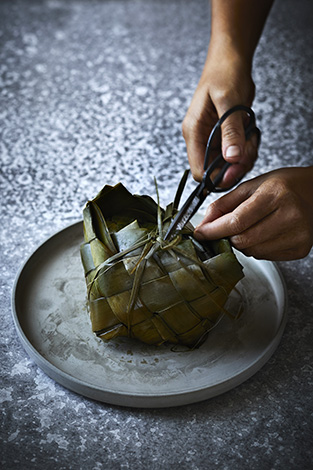
Hāngi is a traditional method of cookery used by Māori to cook food beneath the ground over hot volcanic rocks. It takes almost a whole day to cook a Hāngi, and it’s hot, hot labour intensive work which is why it started to be used less and less with the arrival of the British and the introduction of gas and electricity. The result is food that is incredibly moist and has earthy and smoky tones throughout.

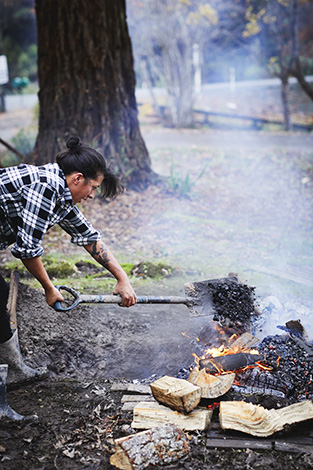
First you dig a pit approximately 3 feet deep, then you place a lot of wood over the pit to create a large fire and place your volcanic rocks among the wood. Light the fire. You want the fire going pretty fiercely for 2 1/2 – 3 hours until the rocks are glowing red. While the fire is going, prepare your food and gather two large containers and fill them each half way with water. In one container place the leaves of two cabbages, in the other container soak 4 – 5 thick cloths that are large enough to cover the hole.

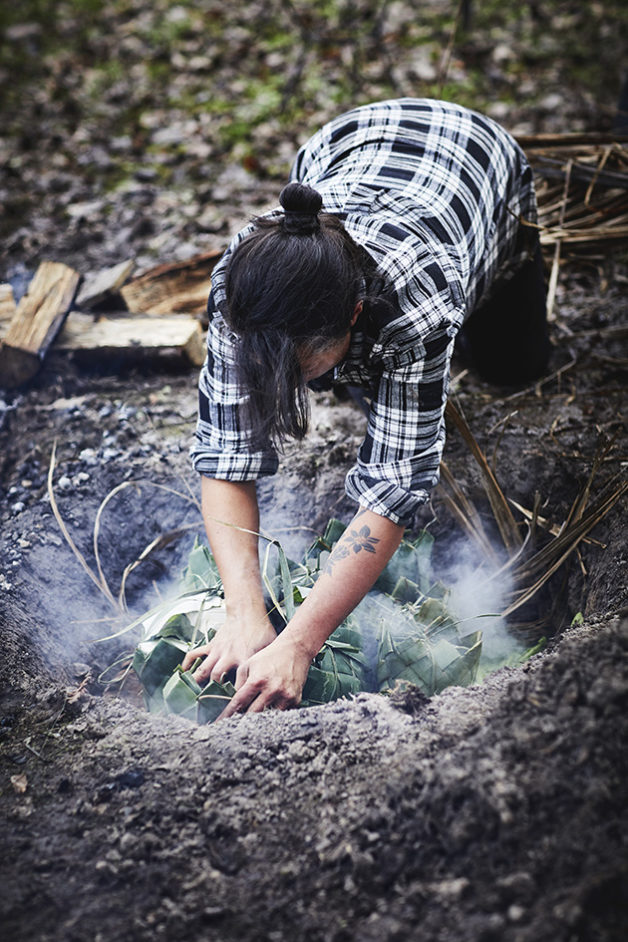
When the rocks are hot, remove them and keep them to the side. Shovel out all the ash and embers from the pit and keep them in a separate pile away from the rocks and hangi pit. Work quickly, your rocks are losing heat as you do this and you want to retain as much heat as possible. Once all the ash and embers are gone, place the rocks back into the hole. Toss your cabbage leaves over the rocks first, then put your food on next, then cover everything with the wet cloths and quickly start shoveling soil into the hāngi pit and keep going until everything is completely covered and the pit is full. Pat down the soil as much as possible to seal the heat in especially around the edges of the pit. If steam appears to escape from certain points, cover it with more soil and pat down. Depending on how large the hangi is or the size of the ingredients inside, the food will take approximately 4 hours to cook.

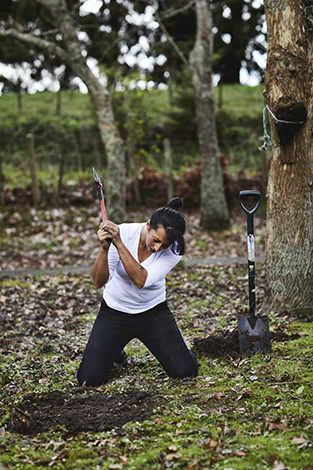
Hiakai pop up dinner by Monique Fiso Moique Fiso chopping tree roots, whilst digging the pit for her Hangi at Hiakai pop up dinner by Monique Fiso. Moique Fiso taking a quick breather, whilst digging the pit for her Hangi at Hiakai pop up dinner by Monique Fiso. Moique Fiso loading up the Hangi pit for her Hiakai pop up dinner by Monique Fiso. Hiakai pop up dinner by Monique Fiso, Monique preparing the Hangi pit The venue/ The tent. Hiakai pop up dinner by Monique Fiso in Waimauku, Winter 2017. Monique Fiso/ Hiakai Book published by Penguin Random House 2019. Photography by Manja WachsmuthHiakai pop up dinner by Monique Fiso Hiakai pop up dinner by Monique Fiso Hiakai pop up dinner by Monique Fiso Hiakai pop up dinner by Monique Fiso, Monique showing Mamaku Moique Fiso taking food baskets out of the Hangi pit for her Hiakai pop up dinner by Monique Fiso.

Why cook in an earth oven instead of over open flame?

A Hāngi works more as a method of steaming, whereas fire is direct heat and roasting. Ancient Māori were masters of both methods. Hāngi was an ideal method of cookery in ancient Māori times because they could light the fires, heat the rocks, place the food in the pit, cover it and go out hunting, fishing or take on any other work that needed to be done on the Pā (Māori Settlement/Village), then come back at the end of the day and there would be all this food ready to go beneath the ground. In times of war this method was especially useful because once the pit is sealed, it’s almost undetectable whereas if you were cooking over an open fire your enemy would be able to spot your location from many kilometers away.

Tips on matching meat and herbs in the earth oven?

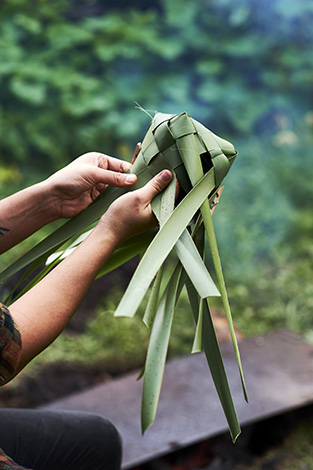
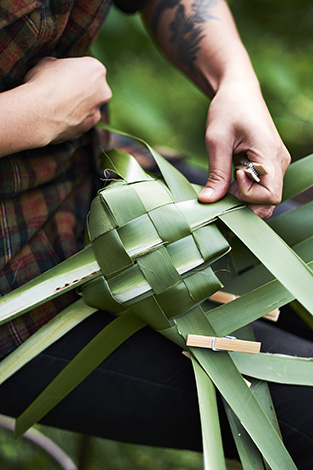
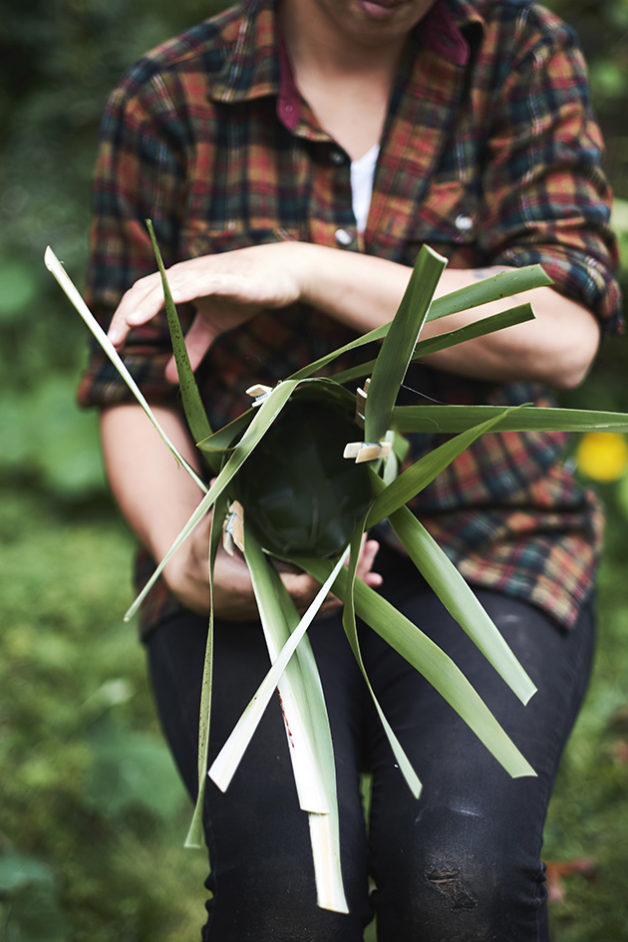
Ancient Māori actually have plants that they specifically line kete baskets with depending on what protein they’re cooking, a sort of guideline if you will. If you are cooking Kaimoana (seafood) or any animal that lives of seafood e.g. Tītī Bird, then the rule of thumb is that you choose herbs, seaweeds and plants that grow along the coast to go in your Kete basket. If you are cooking Quail, Weka or Pigeon you would pick plants and herbs that grow in the forest around the animal’s natural habitat. It’s simple and it works. Of course you can always mix things up to suit your taste. I use a lot of the native plants and herbs to make brines and rubs as well as using them in my linings. Each to their own.

What’s the biggest challenge for you, running Hiakai?

The biggest challenge for me is that there are almost no producers or suppliers of indigenous Māori ingredients, and this is a big reason why when people come to New Zealand they can’t find any Māori restaurants. Currently I have no choice but to forage for a majority of what appears on the menu. If I were to open a European, Indian or Mexican restaurant in New Zealand I’d been able to call a few suppliers and have things delivered to my restaurant door, no problem. That’s just not the case with Māori ingredients which is very odd considering we are the indigenous culture of New Zealand, you’d think that foods endemic to our land would be the easiest to get a hold of. Things are changing though, Hiakai is having a tremendous amount of influence in the New Zealand food scene and the demand for Māori ingredients across the country has increased demand so now there are companies that have just begun commercially growing and harvesting Kawakawa, Horopito, Pikopiko, Puha, Native Berries, etc. I’m incredibly proud that Hiakai has impacted the New Zealand food scene in this way in such a short amount of time.

Hiakai pop up dinner by Monique Fiso Hiakai pop up dinner by Monique Fiso Moique Fiso foraging native plants for her Hiakai pop up dinner by Monique Fiso. Hiakai pop up dinner by Monique Fiso, Monique foraging for Matipo in the Waitakeres. Moique Fiso foraging for Horopito and other native plants for her Hiakai pop up dinner by Monique Fiso. Food; Cooking; Hiakai pop up dinner by Monique Fiso, Monique foraging for Manuka in the Waitakeres. Foraging for native herbs for the Hangi. Hiakai pop up dinner by Monique Fiso in Waimauku, Winter 2017. Monique Fiso/ Hiakai Book published by Penguin Random House 2019. Photography by Manja Wachsmuth

What are your future plans?

There’s a lot on the go at the moment. I’m currently in the process of transitioning Hiakai from a pop up into a dining experience that will be a fixed location, it’s going to mean that I can grow my own vegetables and herbs, and also allow me to take the food up another level because I won’t be shifting the entire operation across the country every few months like I have been doing this past year. I’m writing a book on Māori cuisine at the moment, this is going to take some time as a lot of Māori culinary knowledge was passed on orally so to fill the blanks I have to go through historical accounts from early European settlers as well as interview a lot of Kaumatua (Māori elders) from different tribes to piece everything together.

How do you think the New Zealand food scene compares to the Nordic food scene? Any parallels?

I feel that the New Zealand food scene is going in the same direction that the Nordic food scene went in the early 2000s. Chefs are starting to look at how best to utilize what is grown locally here rather than using imported ingredients from overseas to create their menus. The subject of “What is New Zealand Cuisine?” has been a topic of hot debate among Chefs, Food Writers and Producers. Our diets and food trends over the past 150 years has been heavily influenced by Britain so most of our restaurants are more “British-New Zealand” than anything else. Slowly New Zealand is starting to pull away from that and people are taking culinary cues from what grows in our own backyards rather than bringing in ingredients from other countries and trying to mimic England, Europe and North America.

Explain about the herbs you use (the flavours and other characteristics), and how to swap these for things commonly found in Scandinavia

Just follow the same rules that the ancient Māori did with respect to choosing herbs that grow in the same areas that your chose meat, fruit or vegetable is growing in. At the end of the day, food is subjective. You can pair almost any herb you like with the food you’re planning to put in your Hāngi, just bear in mind you’ll want it to pair well with earthy, smoky flavors and it needs to be available.
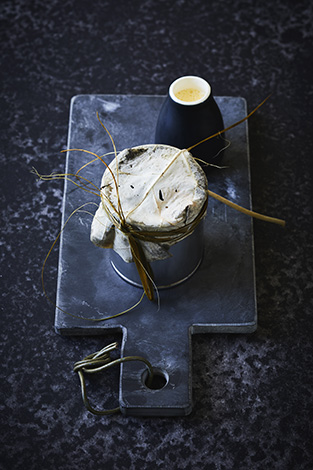
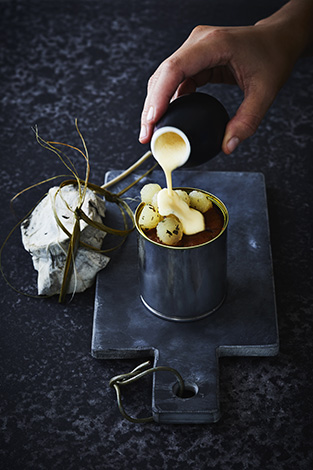
Hangi Steamed Pudding, Roasted Corn Anglaise, Horopito Spiced Apples. Hiakai Winter Menu by Monique Fiso. Recipe and food styling by Monique Fiso. Styling and photography by Manja Wachsmuth. Hangi Steamed Pudding, Roasted Corn Anglaise, Horopito Spiced Apples. Hiakai Winter Menu by Monique Fiso. Recipe and food styling by Monique Fiso. Styling and photography by Manja Wachsmuth. Plate and butter dish from The Propsdepartment. Background from

Want to read more about kiwi chefs I’ve worked with?
Tom Hishon, Orpans Kitchen
Natasha MacAller, Vanilla Table
Peter Gordon, The Sugar Club
Eating well, Everyday

Peter Gordon‘s “Everyday” cookbook was recently re-published as “Eating Well, Everyday” by Jacqui Small. Peter’s book has the most recipes I cook, out of any of the books on my shelf, and was a particularly great project to work on, as I was given a lot of creative freedom. Peter is great like that. He puts a lot of faith into the people he chooses to work with. One of the things I really enjoy about shooting a cook book, is coming up with the theme for the book. How to bring all the recipes together and break the chapters up with chapter openers and incidentals.

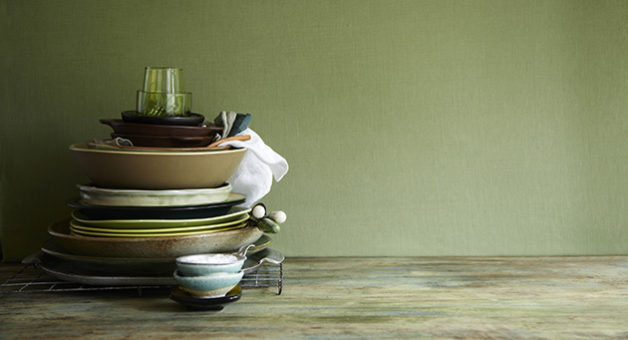
In this case, with “Eating Well, Everyday” we used a lot of props, and I thought it could be fun to try and colour code each chapter, and create a chapter opener, using the props from the dishes that appears in that chapter. Stacking everything up in a simple and beautiful way, creating a natural pause between each chapter of the book. Off course some of the setups were rather time consuming to set up, and quite wobbly, despite their easy and serene look. I like to keep things real and simple, and using these principles in Peter’s “Everyday” book, seemed to work quite well.

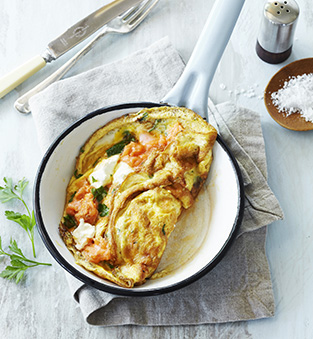
Probably the “Everyday” recipe I cook the most out of anything I’ve ever shot! Something as simple as an omelette, you wouldn’t think requires much of a recipe,  however this one gives you perfect, and tasty eggs, with the right amount of fluff and umami!

SMOKED SALMON AND GOATS CHEESE OMELETTE
Serves 2

You can use either hot-smoked or cold-smoked salmon, and the goat’s cheese can be
replaced with most other cheeses.

5 eggs
1 handful flat parsley, coarsely chopped
4 tbsp cold water
salt & pepper
2 knobs butter (or 1 tbsp olive oil)
100 g smoked salmon, sliced or flaked
80 g goat’s cheese, crumbled (or your fiavouite cheese)
hot buttered toast, to serve

1. Crack the eggs into a bowl. Add the parsley and the cold water. Season with salt and pepper and use a fork to beat the eggs for barely 4 seconds to break the yolks.

2. Place a 15-24 cm frying pan (ideally non-stick) over medium-high heat.

3. Add half the butter (or oil) and when it begins to sizzle pour in half the eggs. Swirl
it around a bit and use a spoon or spatula to bring the set outer egg into the centre until it all begins to set.

4. Lay half the salmon and half the cheese across the centre and leave for another 5 seconds. Carefully fold one edge over the filling, then gently flip the omelette over. Give it a few more seconds, then slide onto a hot plate while you cook the other one.

5. Serve immediately with hot buttered toast.

Recipe © Peter Gordon


Food styling and props by Grant Allen. Additional props by The Propsdepartment. Photography and styling by Manja Wachsmuth.

More cookbook snippets? How about Vanilla Table or Spice Health Heroes?

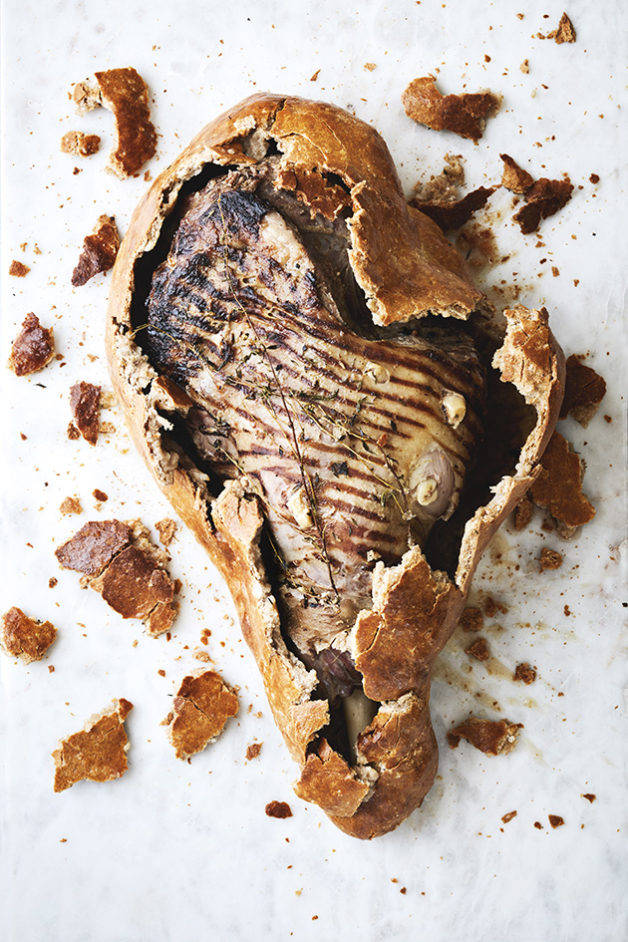
Salt Dough Baked Leg of Lamb

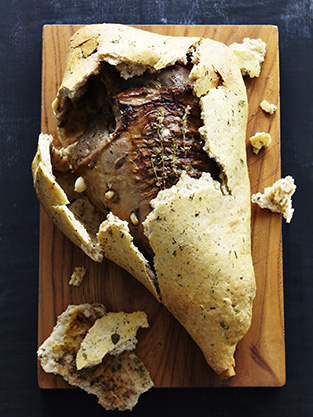
Salt Dough Leg of Lamb. Cooking with Salt. Recipes, foodstyling, styling & photography by Manja Wachsmuth

SALT DOUGH BAKED LEG OF LAMB
serves 8-10

Baking a Leg of Lamb in salt dough takes a bit of patience and concentration, but slow cooking your meat like this, ensures great flavor and moisture and it will be worth all your efforts. Furthermore cracking the crust open at the dinner table is a bit of a showstopper!

2 kg leg of lamb, French trimmed
1 tbsp finely chopped thyme
6 cloves garlic, halved lengthways
1 tbsp Dijon mustard
Extra thyme leaves on stem

Salt dough:

700g/ 6 cups plain flour
300 g / 2 ½ cup sea salt
1 ½ tbsp freshly ground pepper
3 egg whites, lightly beaten
1 ½ cup/ 375 ml water
2 egg yolks mixed with a little cold water

Method leg of lamb:

Pre heat the oven to 180ºC

Combine the thyme and the mustard in a small bowl. Cut 12 deep slits in the leg of lamb and push in the garlic cloves. Rub the mustard paste over both sides of the lamb. If you have a large flat grill plate, the leg of lamb can be browned and cooled before rubbing with the mustard mixture. This doesn’t change the flavour, but does make the lamb look more attractive when the crust is broken.

Method salt dough:

Mix flour, salt and pepper in a bowl to combine. Slowly add the combined egg whites and water to make dough, stirring with a spoon, adding a little more water if necessary to bring the dough together. Tip onto a lightly floured bench and knead for a couple of minutes until well combined. Don’t let the dough rest, as this will make it dry out.

Roll the dough to a large 40 cm x 45 cm rectangle.

Place extra thyme leaves on stem on the dough and the leg of lamb on top, presentation side down, and bring the sides of the dough up, over the lamb. Wet the edges of the pastry and press firmly to make sure the lamb is completely sealed. Turn the lamb right side up and place on a lined baking tray. Wet the pastry where necessary and smooth with your fingers to seal any cracks, making sure the dough is sealed tightly. Brush the dough with egg wash.

Roast for 1 ½ hours, then remove from the oven and rest the leg of lamb for 15 minutes.

To serve:

Carefully break the crust open and pour the cooking liquids into a jug (or discard). The cooking liquids can be used as a stock for making gravy to accompany the lamb. Lift the lamb out of the crust, then carve against the grain and serve.

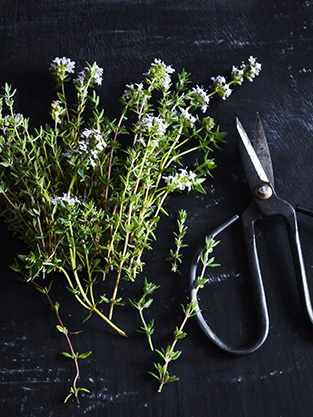
Thyme. Cooking with Salt. Recipes, foodstyling, styling & photography by Manja Wachsmuth. Recipes for MAD&venner. Salt Dough Leg of Lamb. Cooking with Salt. Recipes, foodstyling, styling & photography by Manja Wachsmuth. Recipes for MAD&venner.

This recipe is part of my salt story published in MAD&venner #129 2015 & Matmagasinet Nord #23 2017, focusing on using salt as a main ingredient for cooking or flavouring. Try these recipes from this series too:
Blackberry Grav Lax
Salt & Vinegar Potato Skins
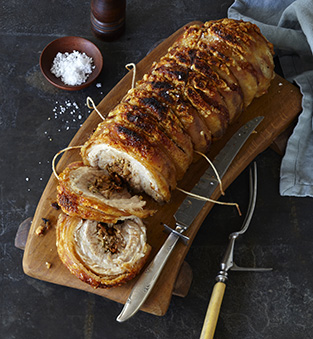
Bork Belly in Brine with Cripsy Crackling
The Perfectly Salty Margarita
Oozy Salted Chocolate Caramel Tart
Salted Caramel Ice Cream
Golden Pavlova with Summer Berries and Salted Chocolate Sauce

© Manja Wachsmuth 2017

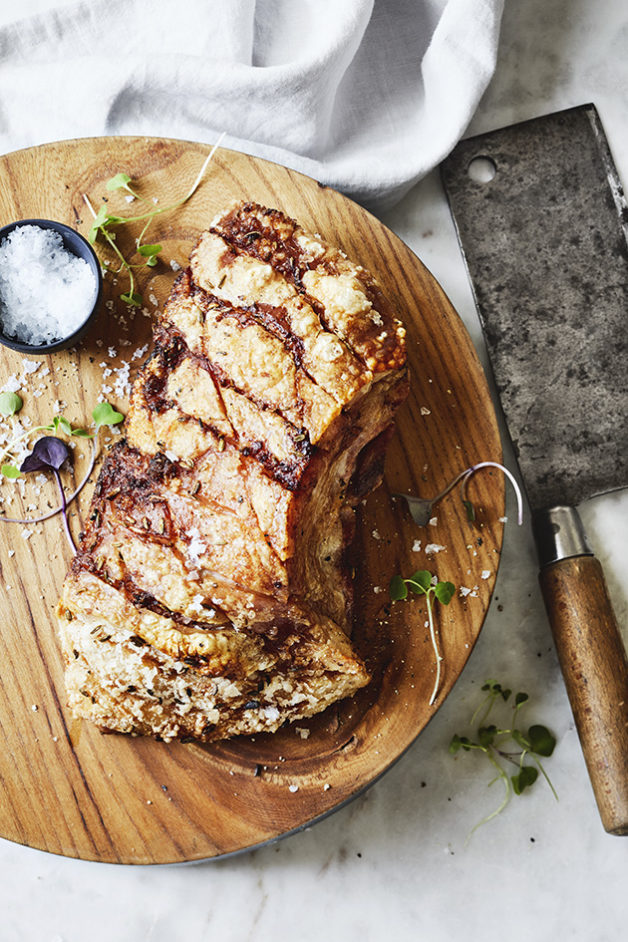
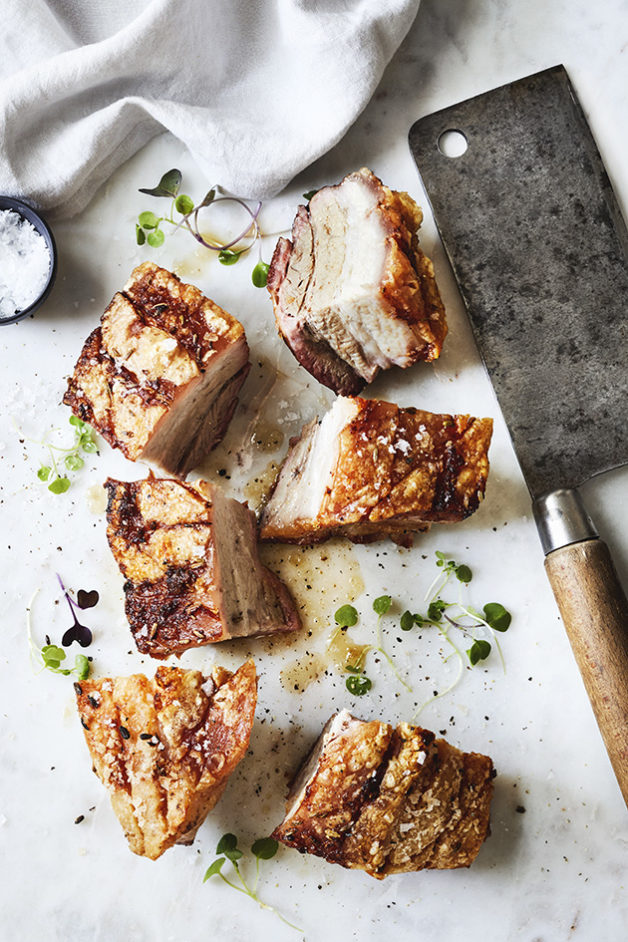
Bork Belly in Brine with Cripsy Crackling

Cooking with Salt. Pork Belly in Brine with Crispy Crackling. Recipes, foodstyling, styling & photography by Manja Wachsmuth

PORK BELLY IN BRINE WITH CRISPY CRACKLING
Serves 4, as part of a main course

Nothing beats a properly done pork belly. This recipe brines the meat, ensuring a really nice flavour and crispy crackling. You can either do this in the oven or try it on the BBQ for a delicious meal on those long, bright summer nights.

1 kg Pork Belly, skin on
30 g Sea Salt Flakes
1 tsp Fennel Seeds
250 ml Water

Method Oven:
Score the skin of the pork belly in slices or squares. Be careful not to cut into the meat.
Place the pork belly in a non-reactive, deep-sided roasting dish. Rub the salt into the meat on both sides and leave for 30 minutes. Turn the belly so the skin is facing down, and then cover in enough cold water to submerge the meat. Cover tightly and place in the fridge for 24-48 hours.
Preheat the oven to 250º C.

Drain the brine from the pork belly and pat it dry all over with a paper towel. Make sure that the skin is completely dry, otherwise it won’t crackle. Rub the skin with a little olive oil and sprinkle with flaky sea salt and fennel seeds. Place the pork skin side up on a rack that fits in a roasting dish and roast in the oven for 45 min, or until the skin starts to crackle. Remove from the oven and reduce temperature to 180ºC. Pour water into the roasting dish, ensuring that the skin remains dry. Return to oven and cook for 1 hour and 15 min, until tender.
Remove from the oven, and leave to rest in a warm place for 15 min, before cutting the meat into square bites, or slices. Serve while hot.

Method BBQ:
Note, this is a guideline only. Correct cooking on bbq is highly dependent on a number of factors such as the size of the bbq, the type of coal / briquettes, the placement of the roast, etc. The most important thing to remember is to check the roast often and to turn the meat to ensure even cooking.

We have used a medium-sized kettle bbq with lid.

Fill two coal trays with briquettes (it is advantageous to use briquettes and not charcoal as they hold the heat longer) and place on each side of the BBQ, leaveing a space in the middle that the roast can sit over. Place a foil tray between the coal trays (underneath the roast), to catch meat juice so that it doesn’t drip into the embers, and either causes flames or makes the BBQ difficult to clean. Light the briquettes and put a rack over to cover the entire grill. Wait for the briquettes to burn down until they are fiery red, very hot and with quite a low flame.

Place the roast on the rack, skin side up, over the drip tray between the coal trays, and roast for 45 minutes – 1 hour. Check often.
Rotate the roast occasionally to make sure it is cooking evenly on all sides, and always position with the skin side up.

For crispy crackling, turn the roast sideways, with the cracklling facing one of the coal trays, a little closer to one of the trays to expedite the process, keep an eye out, it burns easily! The crackling is done when it’s bubbled up and crispy all over. Total cooking time approx. 1-1.5 hours. Remove the roast from the heat and rest for 15 minutes. Carve and serve while hot.

Cooking with Salt. Pork Belly in Brine with Crispy Crackling. Recipes, foodstyling, styling & photography by Manja Wachsmuth

This recipe is part of my salt story published in Matmagasinet Nord #23 2017, focusing on using salt as a main ingredient for cooking or flavouring. Try these recipes from this series too:
Blackberry Grav Lax
Salt & Vinegar Potato Skins
Salt Dough Baked Leg of Lamb
The Perfectly Salty Margarita
Oozy Salted Chocolate Caramel Tart
Salted Caramel Ice Cream
Golden Pavlova with Summer Berries and Salted Chocolate Sauce

© Manja Wachsmuth 2017

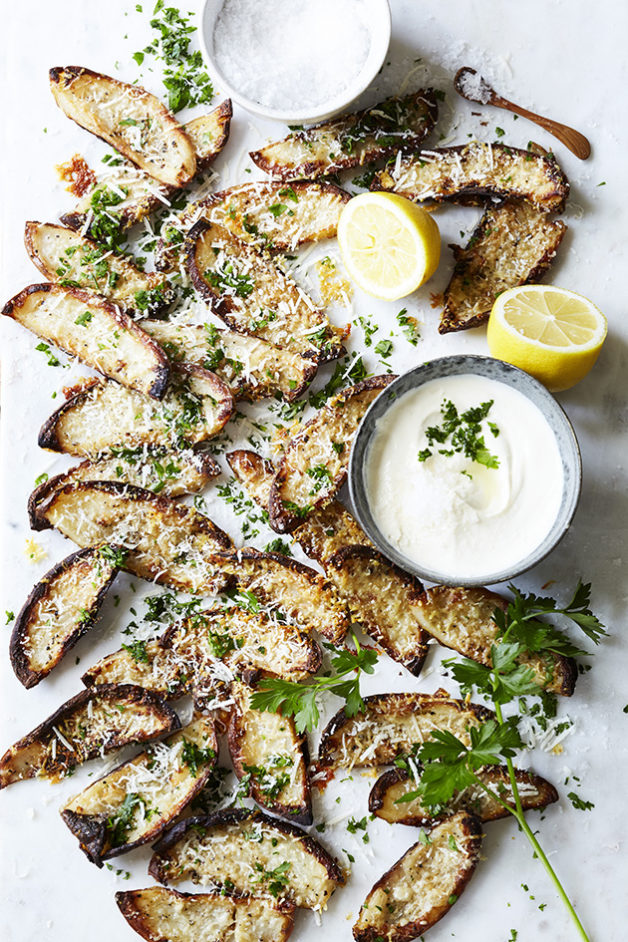
Crispy Salt and Vinegar Potato Skins

Salt and Vinegar Potato Skins with Tahini Dressing. Cooking with Salt. Recipes, foodstyling, styling & photography by Manja Wachsmuth

SALT AND VINEGAR POTATO SKINS WITH TAHINI, SOUR CREAM DIP
Serves 4-6

These salt and vinegar potato skins are inspired by the kiwi obsession with the salt and vinegar flavour combination on potato chips. Very crispy, salty and tangy and VERY DELICIOUS!

8 medium sized Potatoes
1/4 cup / 75 ml White Wine Vinegar
Extra Virgin Olive Oil for brushing
50 g Parmesan Cheese, grated
Freshly ground Black Pepper
1 handful Italian Parsley, finely chopped
5 tsp Sea Salt

Tahini Sour Cream Dip:

225 g Sour Cream/ Crème Fraiche
2 tbsp Tahini
Lemon Juice from 1 lemon
1 tsp Sea Salt

Method Salt and Vinegar Potato Skins:

Preheat oven to 250ºC.

Wash the potatoes and cut into halves. Place on baking paper on a baking tray and bake in the oven for 45 min until just tender, but still firm. Set aside to cool. Scoop out the flesh into a bowl, leaving ½ cm thick shell. The potato flesh may be set aside for another use (mash). Lightly score the interior of each potato with a fork and brush generously with vinegar, allowing the flavours to soak in.

Preheat oven to 250ºC grill.

Brush the potatoes with olive oil and season generously with salt and a little ground pepper. Place the potato skins, skin side up, on a baking tray and place under the grill in the oven and cook for 2-3 minutes, making sure they don’t burn. Turn the potatoes over and grill for another 5 minutes. During the last few minutes of grilling, sprinkle each potato with Parmesan and grill until melted. Garnish with Parsley and serve the Salt and Vinegar Potato Skins while hot, with Tahini Sour Cream Dip.

Method Tahini Sour Cream Dip:

Mix sour cream, tahini, lemon juice and a generous sprinkle of sea salt in a bowl. Set aside to cool in the fridge before serving.

Enjoy!

This recipe is part of my salt story published in MAD&venner #129 2015 & Matmagasinet Nord #23 2017, focusing on using salt as a main ingredient for cooking or flavouring. Try these recipes from this series too:
Blackberry Grav Lax
Pork Belly in Brine with Cripsy Crackling
Salt Dough Baked Leg of Lamb
The Perfectly Salty Margarita
Oozy Salted Chocolate Caramel Tart
Salted Caramel Ice Cream
Golden Pavlova with Summer Berries and Salted Chocolate Sauce

© Manja Wachsmuth 2017

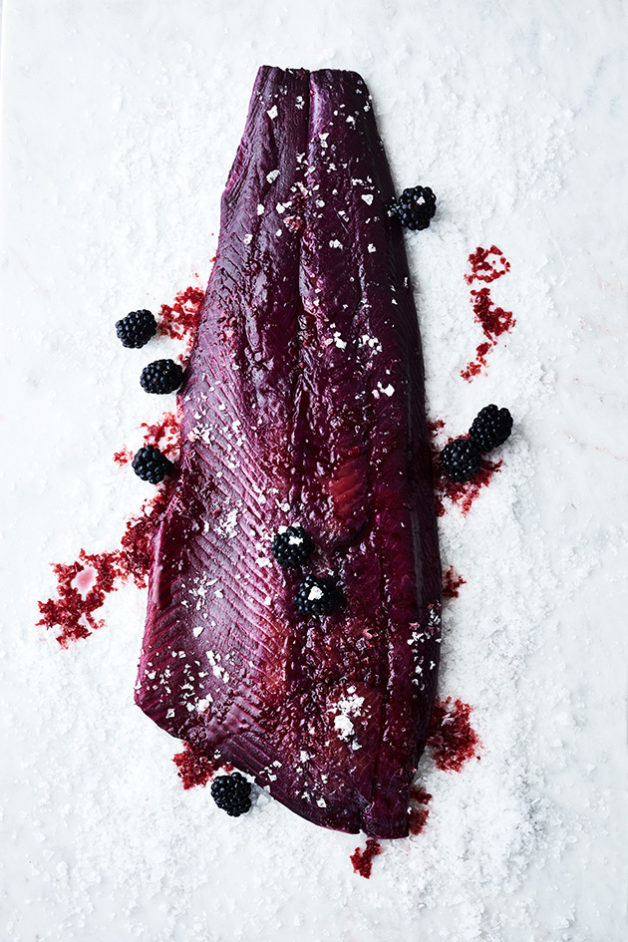
Blackberry Grav Lax

Salt recipes Salt recipes Salt recipes Cooking with Salt Cooking with Salt

BLACKBERRY GRAV LAX
Serves 8-10

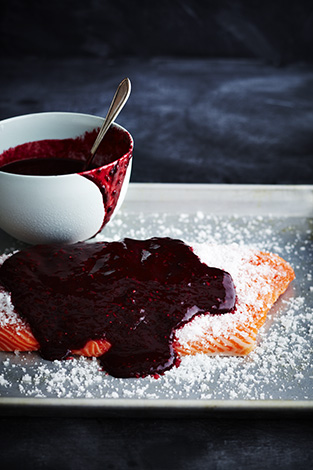
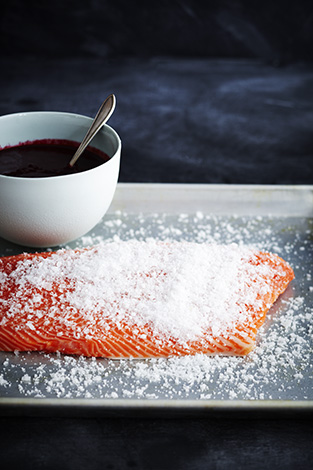
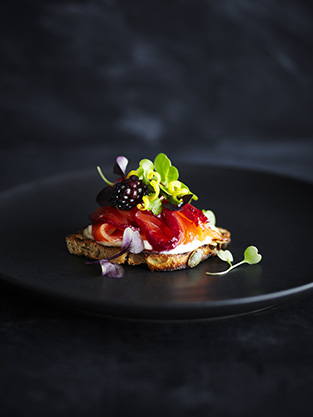
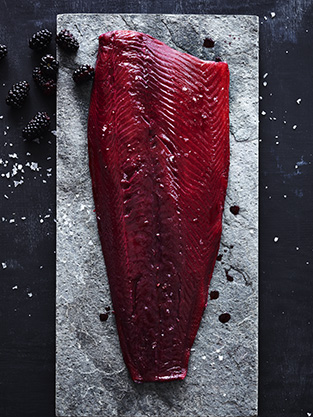
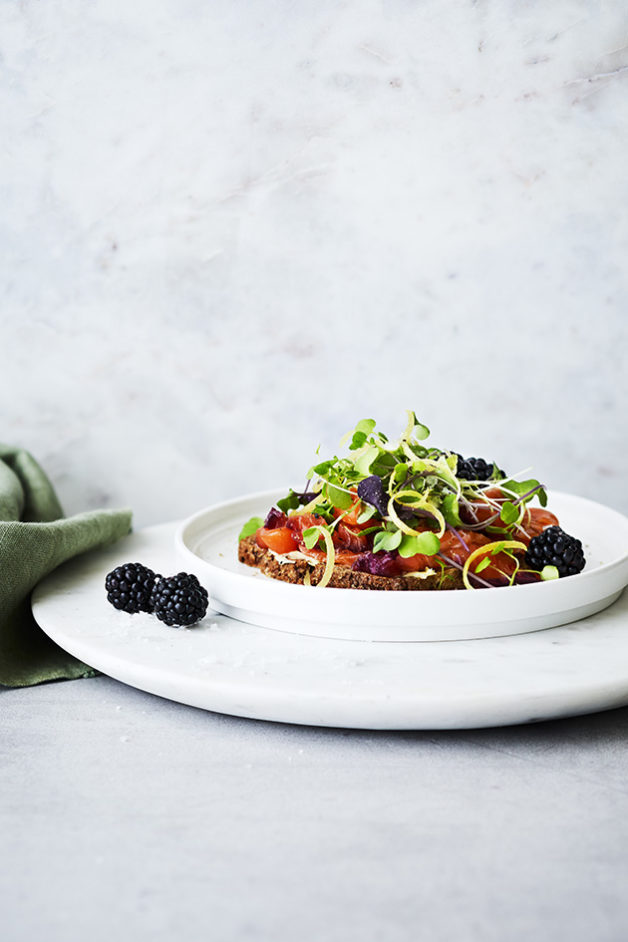
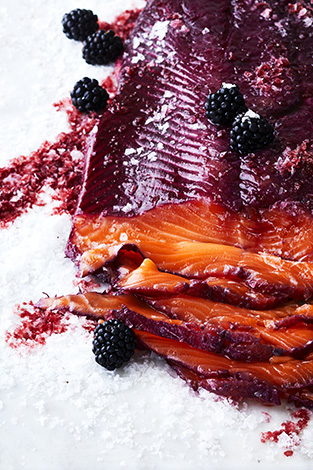
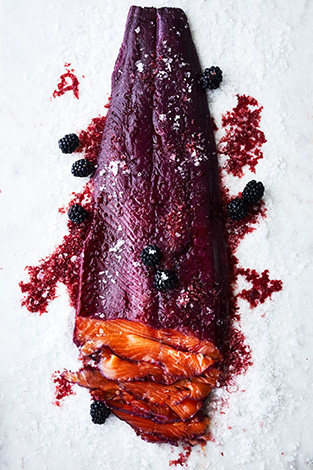
In this Grav Lax recipe salt, in combination with the sugar, alcohol and fruit is used to draw moisture out of the flesh and preserve the fish. Giving it a lovely smooth texture and a very slight salty taste. The traditional Scandinavian Grav Lax, has had an overhaul with blackberries, creating a stunning fillet, that looks great on your smorgasbord.

1 kg Salmon Fillet, skin on, pin boned
½ cup/70g Sea Salt Flakes
¼ cup Raw Sugar (weigh)
2 tsp Heilala Vanilla Powder (seeds from 2 vanilla pods)
2 tbsp freshly ground Pepper
3 cups/ 400 g Frozen or fresh Blackberries
1/3 cup/ 1 dl Snaps
2 tbsp fennel seeds

Horseradish Dip:

Horseradish cream
Sour cream
Salt & Pepper to taste

Serving:

Rye Bread
Micro greens (coriander & beetroot sprouts or watercress)
Lemon rind
Blackberries

Method Grav Lax:

Place sea salt, sugar, vanilla powder, pepper, blackberries, snaps and fennel seeds in a food processor or blender, and blitz to mix.

Place the salmon skin side down on several layers of cling film, (enough to wrap around and cover the salmon), and place on a baking tray. Using tweezers, remove the pin bones along the side of the salmon fillet. Spread the salt and blackberry mixture over the fish, making sure it’s completely covered. Then wrap the cling film tightly around the salmon. Place a second baking tray or chopping board over the fillet and weigh it down with a heavy item (Weighing the fish down, is not usually part of traditional Swedish curing technique, however it’s often used in Southern Hemisphere cooking, to help draw moisture out. This technique may give the fish a tougher texture).

Refrigerate and cure for at least 24 hours, up to 48 hours.

Remove the cling film and clean the seasoning mixture from the salmon with a wet teatowel. Avoid rinsing the filet, under the tap, as this will rinse out the beautiful red colour. Serve thinly sliced on toasted rye bread, garnish with micro herbs (ie coriander & beetroot sprouts or watercress), lemon rind, blackberries and horseradish dip (see method below).

Method Dip:

Mix horseradish cream and sour cream, evenly 50/50 and season with sea salt and pepper to your liking.

The Grav Lax will keep 3-4 days, chilled.

Cooking note: It is important to use sea salt crystals and not rock salt, as flavour and texture will vary greatly.

Salt recipesSalt recipes Salt recipes

This recipe is part of my salt story published in MAD&venner #129 2015 & Matmagasinet Nord #23 2017, focusing on using salt as a main ingredient for cooking or flavouring. Try these recipes from this series too:
Salt & Vinegar Potato Skins
Pork Belly in Brine with Cripsy Crackling
Salt Dough Baked Leg of Lamb
The Perfectly Salty Margarita
Oozy Salted Chocolate Caramel Tart
Salted Caramel Ice Cream
Golden Pavlova with Summer Berries and Salted Chocolate Sauce

© Manja Wachsmuth 2017

Spice Health Heros

Spice Heros

Spice Health Heros. My first proper job after having my first child and starting work again after maternity leave. It was quite a big job to take on, and shooting a book can be very stressful at the best of times, let alone when you are sleep deprived and caring for a baby. But the end result just makes me so super proud! Many of the images are so stunning and definitely some of my very best work. I’m really excited to tell you a bit more about the background thoughts of my work on Spice Health Heros and to be sharing a few of my very favorite recipes from it.

Spice Health Heros by Natasha MacAller, published in UK, US, Aus & NZ by Jacqui Small Oct 2016.

When Natasha first came to me with her spice recipes, it was really only an idea for a book proposal for a followup to her Vanilla Table. Originally we put togethether 10 images for a book about pepper, but quickly the idea grew, and finally we were asked to create a stunner of a book about spices and their many health properties, including pepper. Initially I was quite keen on a very moody book where all the colour would come from the food and the spices themselves, but the publisher thought it might all get a bit dark, and asked me to re-think it. Finally I ended up adding a few lighter and a few more colourful backgrounds, which I think has really lifted the whole book, and brought it to life as you flick through the pages.


Spice Heros Spice Book, Jacqui Small Publishing Spice Book, Jacqui Small Publishing Spice Heros

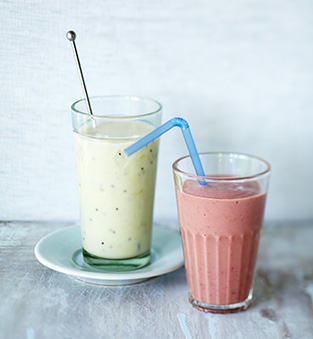
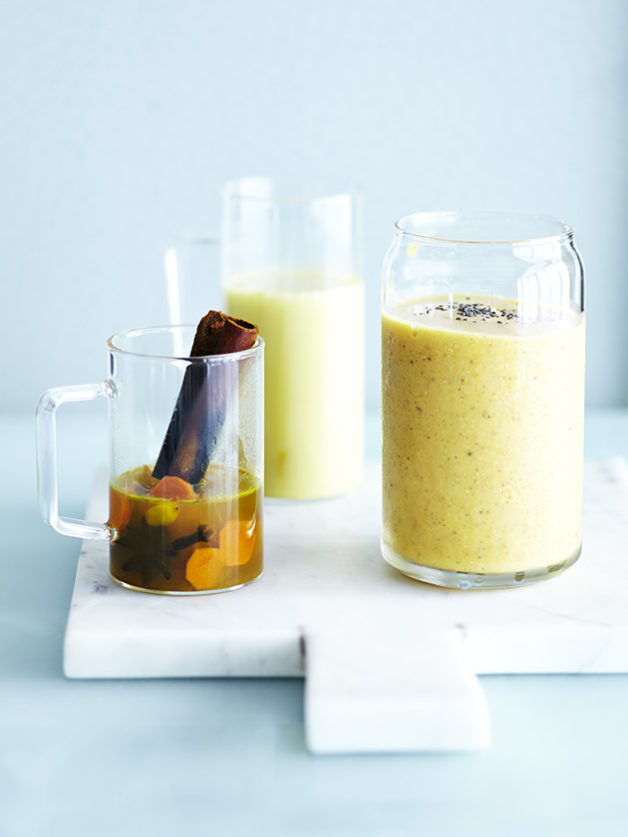
I just looove this smoothie. It reminds me of tropical beaches, a light breeze and a relaxing daze in a hammic in the sun. It makes me happy both summer and winter! Turmeric was a spice I’ve never really used before, but after being introduced to it by Natasha, it has now found a regular space in my fruit and vegebowl, ready for juices and smoothies. The pepper adds some wonderful heat to compliment the sweetness and should not be left out. (MW)

TROPICAL TURMERIC SMOOTHIE
serves 1

The combination of fruit and spice and rich-but-healthy coconut milk is a favourite before a workout or just as a get-to-work beverage! If you prefer, you can use papaya instead of mango and add three leaves of coriander (cilantro). For a thicker smoothie, freeze the coconut milk in cubes before blending. (NM)

85g pineapple
115g fresh frozen mango
2.5 x 5cm strip orange peel
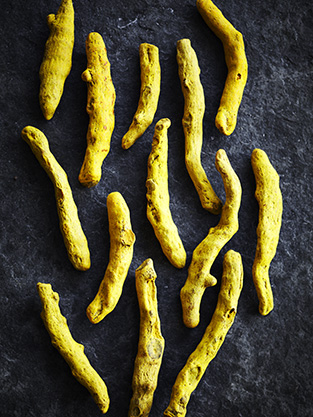
5cm piece turmeric root,
or 1⁄4 tsp ground turmeric
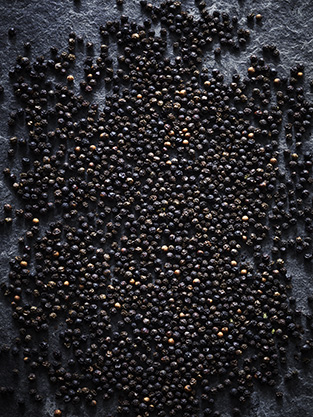
1/8 tsp cracked black pepper
1⁄4 tsp cardamom seeds, toasted and ground
1 tbsp fresh lime juice
240ml (1 cup) coconut milk
4–6 ice cubes
1 tsp chia seeds

Put all the ingredients except the chia seeds into a high-speed single-serve blender-juicer and blend until smooth. Sprinkle chia seeds on top and serve.

Spice Heros Spice Heros Spice Heros

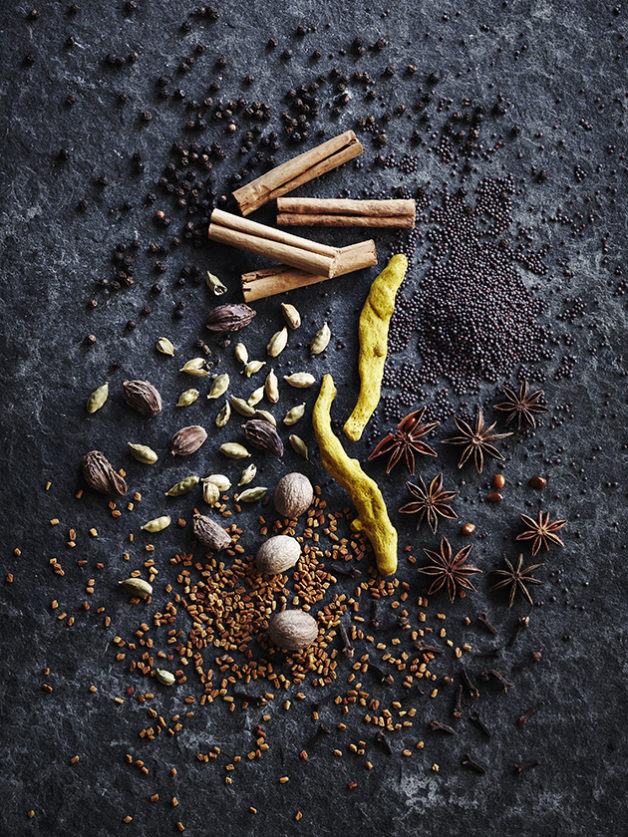
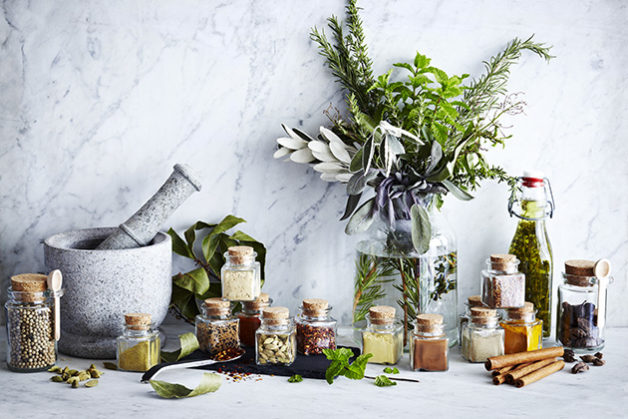
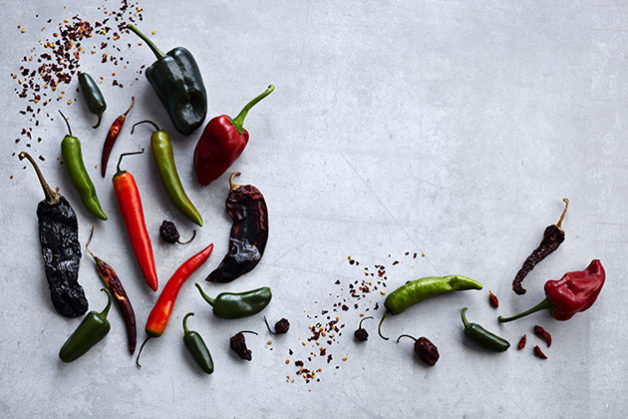
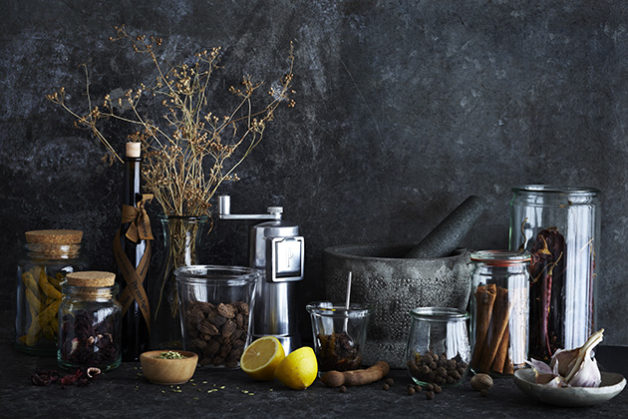
The 3 images above are part of the concept for the chapter openers in Spice Health Heros. I’ve always loved coming up with the concept of the chapter openers for a book. As a natural break between all the recipes, they make up an important part of the look and feel of a book.

The hard part is usually coming up with something I haven’t seen or done before, as some of the criteria are set in stone. Usually it has to be a double page spread, and there needs to be negative space for the chapter title. For Spice Health Heros, the chapter openers would also create the intro to each class of spices, so they needed to be informative as well as beautiful and inspiring. I chose a neutral background, and a flat lay concept to keep in line with the trend of Scandi cool, which was part of the general brief for Spice Health Heros.

Spice Heros Spice HerosSpice Heros

Shooting a lot of food for books and magazines, I’ve become somewhat immune to a lot of food.
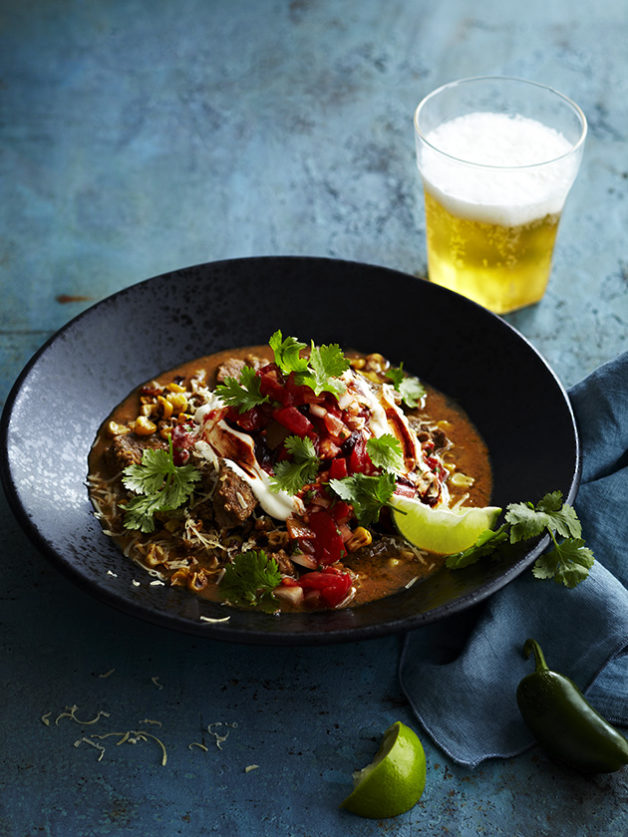
It takes a lot to impress me these days, but every once in a while, I’ll shoot something that really blows my mind. Taste wise I mean. Anne’s Pork Chile Verde, is one of these dishes. It just knocked my socks off. You’d think I would have known what a Chile Verde is, having worked as a food photographer for so many years, but admittedly this was my first. It’s just amazing! The right amount of heat, spice and umami, to make you just want more and more. This is one of those dishes that has truly become the fooodphtographers favorite. Thank you Anne! (MW)

PORK CHILE VERDE
By Anne Conness
serves 4

‘I can’t speak for the scientifc connection between spice and health, but what I do know is that eating spicy things makes me feel happy and satisfied. And when I feel happy, I feel less stressed, and that makes my doctor happy!’(AC)

1 tbsp cumin seeds
1 tsp black peppercorns
1⁄2 tsp cloves
1⁄2 tsp ground cinnamon
1⁄2 tsp cayenne pepper
2 tsp paprika
2 tbsp salt
1.6kg (3.5lb.) pork shoulder, cut into 2cm (3⁄4in.) cubes, most of fat removed
1.2 litres (5 cups) chicken stock

For the corn:
3 ears of corn
2 tbsp butter
30g (1oz./1⁄4 cup) grated Monterey Jack or mild Cheddar cheese

For the sauce:
1 tomatillo, halved and stem removed
1 onion, roughly chopped
2 jalapeños, halved and stems removed
2 Anaheim chilies, halved and stems removed
1 head garlic, cloves separated and peeled
60ml (1⁄4 cup) canola oil
2 tbsp lime juice
11⁄2 bunches coriander (cilantro)
2 tsp cumin
1⁄2 tsp cloves
1⁄4 tsp cayenne pepper
2 tsp paprika
1⁄4 tsp cinnamon
1 tsp salt
350ml (11⁄2 cups) reserved cooking jus (see method)

To serve:
1 tbsp sauce from chilies in adobo or chipotle paste mixed with
115g (4oz./1⁄2 cup) sour cream
1 dash Tajin (a classic Mexican dry seasoning of dried lime juice, chili powder and salt)
4 lime wedges
150g (51⁄2oz./1 cup) pico de gallo (Mexican fresh tomato salsa)
small handful micro-coriander (cilantro) leaves

Preheat the oven to 180°C (350°F/gas mark 4).

Toast the whole spices, cool, then grind to a powder. Stir in the cinnamon, cayenne pepper, paprika and salt. Toss the pork in the spice mixture and put in a roasting pan. Pour over the chicken stock, cover tightly with foil, put in the oven and cook until tender, about 11⁄2 hours. Strain the jus, skimming off the fat, and reserve 350ml (11⁄2 cups) for the sauce. Break up the meat if necessary.

Char the sweetcorn: Shuck the corn and remove the silks. Place the corn cobs on a baking tray on the top shelf of the oven or under the grill (broiler) on a high heat until charred. Leave to cool then place the corn cob in a cereal bowl and, using a sharp knife, cut the kernels from the cob in a downward motion; the kernels will collect in the bowl. Set aside.

For the sauce, toss the tomatillo, onion, jalapeños and Anaheim chilies and garlic in a bowl with the oil. Spread out on two baking trays and roast until caramelized, about 30 minutes at a medium–high heat. Leave to cool.

Blend the caramelized veggies in batches with the lime juice, coriander (cilantro), spices and strained cooking jus. Check the avour and season to taste.

Put the pork in a pan with this sauce and heat up.

Melt the butter in a hot ovenproof pan then add the charred corn. Season with salt and pepper. Sprinkle cheese on top and put in the oven just long enough to melt the cheese.

To serve, put the pork on a plate and top with the corn. Garnish with the chipotle cream, a sprinkle of Tajin, a lime wedge and some pico de gallo. Finish with the coriander (cilantro).

Spice Heros Spice Heros

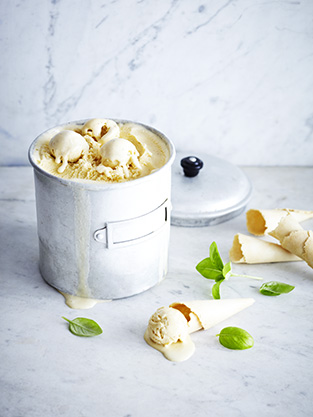
This ice cream is both refreshing and surprising. I love the combination of cinnamon and basil, and it kinda fits perfectly as a Christmas dessert in the warm weather here in New Zealand, if anyone dares to swap out the pavlova! (MW)

CINNAMON BASIL ICE CREAM
By Mindy Segal

makes 1 litre

‘This ice cream was inspired by some beautifully roasted peaches that I bought one year at the farmers’ market for a special dessert. I decided that it needed a little of the garden in the ice cream I served them with so I steeped fresh basil in my cinnamon ice cream. Eureka – delicious! It’s also good served with poached berries. Indonesian (Ceylon) cinnamon is a milder, softer avoured cinnamon also known as true cinnamon. Cassia cinnamon is also fine to use but as the flavour is stronger, the basil-cinnamon balance will have a stronger cinnamon taste when using the cassia variety.’ (MS)

4–6 fresh Indonesian cinnamon sticks
475ml (2 cups) double (heavy) cream
475ml (2 cups) full-fat (whole) milk
13 large egg yolks
225g (8oz./1 cup) cane sugar
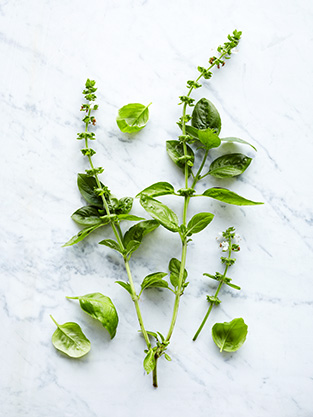
leaves from 1 bunch (70g/21⁄2oz.) cinnamon basil, regular basil or Thai basil, finely chopped
1⁄2 tsp fresh ground cinnamon
pinch sea salt
1⁄4 tsp pure vanilla extract

Put the cinnamon sticks on a baking tray and toast in the oven until hot to touch. Meanwhile, in a heavy-bottomed pan, heat the cream and milk to a simmer. Remove the cinnamon sticks from the oven and crush into pieces. Put the pieces into the warm milk and cream mixture and leave to steep for 1 hour.

Combine the egg yolks and sugar in a 2-litre (2-quart) bowl, whisk thoroughly and set aside. Strain the cinnamon sticks from the milk and cream mixture and discard them. Return the liquid to the pan and bring to the boil, then pour the liquid over the eggs and sugar, mixing thoroughly.
Pour back into the pan and cook over medium–low heat, stirring constantly until the custard coats the back of a spoon (nappe). Pour the hot custard into a bowl and set over an ice bath.

Steep the chopped basil in the hot custard until cool. Add the ground cinnamon and salt and mix thoroughly. When cool, strain the custard through a fine mesh strainer then whisk in the vanilla extract.
Freeze the custard in an ice-cream maker, following the manufacturer’s instructions.

Spice Heros

© Spice Health Heros, available at your local bookstore (in UK, US, Aus & NZ) and online from Amazon
Recipes © Natasha MacAller
Photos © Manja Wachsmuth

Orphans Kitchen

Dish Magazine #58 Dish Magazine #58 Dish Magazine #58 Dish Magazine #58Dish Magazine #58 Dish Magazine #58 Dish Magazine #58

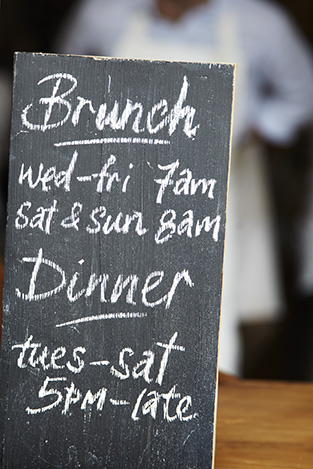
Having shot two editorials of Orphans Kitchen, been there to eat a few times, and also recently went to a ConversatioNZ talk by Tom Hishon, chef and co-owner, I thought it’s probably time to share this fabulous eatery on my blog.

Orphans Kitchen opened in 2014, named as a tribute to their London kitchen where all their “orphan” expat friends would gather for dinner during the holidays, Tom Hishon and Josh Helm was quick to find their niche on the competitive Auckland dining scene, and have had great success.

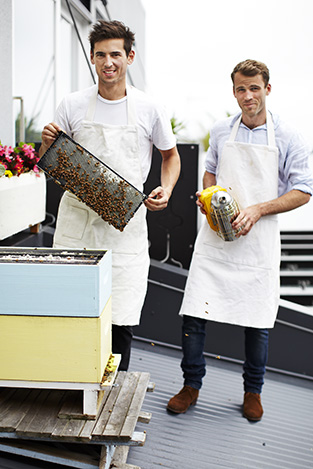
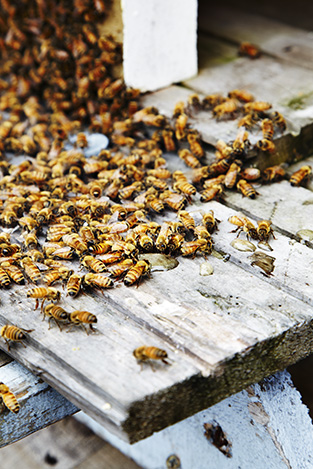
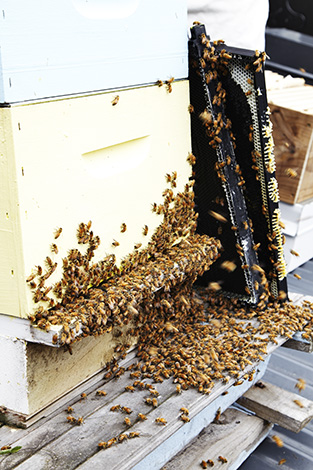
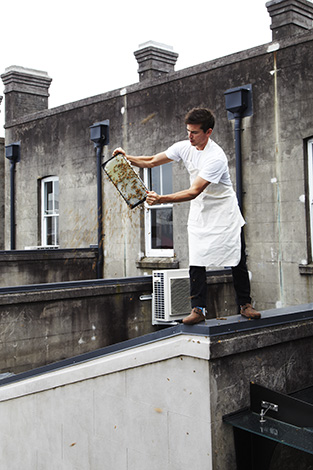
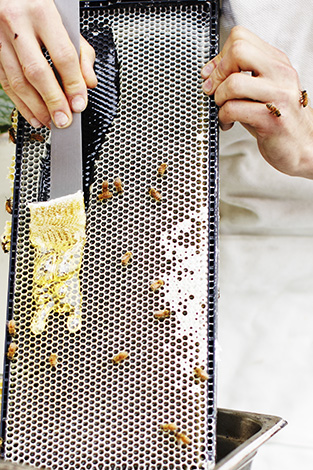
With bees on the roof and a love for locally sourced, organic and sustainable produce the eatery is at the front of the worldwide trend of local, honest ingredients, foraging and anything homemade and wholesome. If you haven’t been, GO!

Here Tom shares a couple of his recipes from the restaurant…

Dish Magazine #58 Dish Magazine #58 Dish Magazine #58 Dish Magazine #58 Dish Magazine #58 Dish Magazine #58 Dish Magazine #58 Dish Magazine #58 Dish Magazine #58 Dish Magazine #58 Homestyle Magazine #60

ROAST PORK FILLET
Serves 6

zest of two lemons
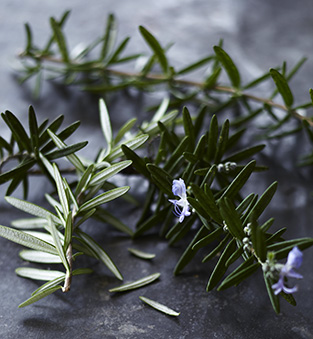
2 long sprigs of rosemary
pork scotch fillets, trimmed (300g of pork per person)
flaky sea salt
grapeseed oil
3 cloves of garlic
100g butter

Zest the lemons, chop the rosemary, then massage into the fillets. Leave overnight on a covered tray. Take out of the fridge one hour before cooking and bring to room temperature.

Preheat the oven to 140°C. Heavily season the fillets with flaky salt. Heat a cast iron pan to a high heat, and add enough grapeseed oil to make a shallow pool in the bottom of the pan. Add the fillets and heavily colour by rolling. Add the butter and garlic and continue cooking in
the foaming butter.

Once you have achieved a very heavy crust, place the meat on a wire rack. Put the rack on top of an oven tray and into the oven, rotating every 20 minutes. At the 60 minute mark the meat should be well roasted through and ready to serve. If you are not confident it is ready, insert a metal skewer in the centre, pull out and make sure the juices are running clear.

Homestyle Magazine #60 Homestyle Magazine #60 Homestyle Magazine #60 Homestyle Magazine #60

SWEDE & CARROT MASH
Serves 4-6

2-3 large swedes, peeled
4 carrots, peeled
3 tbsp olive oil
flaky sea salt
fresh thyme
50g honey
50g honeycomb
olive oil

Preheat the oven to 180°C. Cut the swedes and carrots into chunks and toss with olive oil, a good pinch of sea salt and the thyme. Put into a roasting tray, cover tightly, and roast for an hour and a half, or until very soft. Pour off residual juices, coarsely mash with the honey and season to taste. Top with honeycomb and drizzle with olive oil to serve.

BREAD & BUTTER PUDDING
Serves 6

800ml milk
200ml cream
1 vanilla bean, sliced length-ways
5 sprigs fresh thyme
100g dried currants
90ml Olorosso sherry
60ml water
1 loaf brioche
100g butter
fresh nutmeg
2 pears
zest of half an orange
1 tbsp honey

CUSTARD
1 whole egg
7 egg yolks
100g caster sugar
100g honey

Preheat the oven to 180°C. In a saucepan combine milk, cream, vanilla bean and 2 sprigs of thyme. Bring to a simmer while stirring with a wooden spoon.

Next, make the custard. In a large bowl, whisk the whole egg and yolks together with the sugar and honey until a creamy white texture is achieved. Pour the heated milk mixture over the beaten honey and eggs, while stirring to incorporate.

Place currants in a small saucepan with 60ml of sherry and 60ml of water. Bring to a simmer, cover with a lid then take o the heat until they plump up. Cut the brioche into 2cm slices and butter each side with half the butter. Finely grate nutmeg over the buttered brioche.

Assemble in small ovenproof bowls, layering the brioche with the crusts sticking out. Pour the custard over the top, sprinkle with currants and leave to sit for half an hour.

Place the bowls into a deep oven tray and pour in enough boiling water to come halfway up the side of them. Carefully place the tray in the oven and bake for 35-40 minutes.

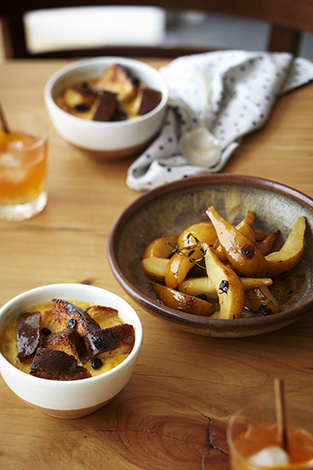
While the puddings are cooking, peel and cut pears into 6-8 wedges, removing the cores. In a non-stick pan, add the remaining butter, thyme sprigs and pear slices. Cook until golden brown, then add honey and remaining 30ml of sherry. Flame, then serve alongside the pudding.

Homestyle Magazine #60

ORPHAN OLD FASHIONED
Serves 2

120ml whisky (any will do, but we prefer to use a rye or a bourbon)
3 cloves
2 cinnamon quills
Angostura orange bitters
2 cubes or 2 level tsp sugar
orange rind

Steep 120ml of whisky overnight with 3 cloves and half a cinnamon quill.

Absorb Angostura in sugar (a cube of sugar on a napkin works best).

Muddle orange rind with sugar in a Boston or large glass.

Fill half a glass with ice and 60ml of whisky. Stir until sugar melts. Top with ice and add another 60ml of whisky. Stir again. Strain liquid from the ice. This can be made in advance. Pour half the liquid into a serving glass with a large block of ice, then squeeze orange rind into the drink to release the oils. Garnish and serve with more orange rind or a cinnamon quill. Drink responsibly.

A selection of these images has previously been published in Dish Magazine#58 and Homestyle Magazine#60. The recipes was also published in Homestyle Magazine #60.
Recipes © Tom Hishon, Orphans Kitchen

Parts of this story also features on my profile on Steller

Pizza on the Weber BBQ

Pizza on the BBQ Pizza on the BBQ Pizza on the BBQ Pizza on the BBQ Pizza on the BBQ Pizza on the BBQ Pizza on the BBQ Pizza on the BBQ

Summer has officially arrived in New Zealand! One thing I love the most about summer is cooking on the BBQ. Last year I discovered cooking pizza on the BBQ, and when you’ve tried it once, it’ll be the only way you’ll ever want to cook pizza again. Pizza on the BBQ is the fool proof way of getting a moist and delishious filling and above all a super crispy base, which you can never seem to get in the oven, regardless of the temperature or quality of pizza stone.

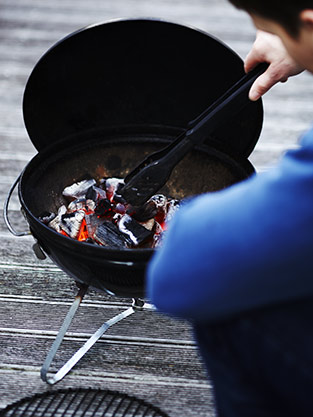
The majority of Kiwis (and probably Ozzies and Americans) swear by th gas BBQ’s and most pizza BBQ recipes will tell you to cook your pizza on a gas BBQ, where you can control the temperature and monitor it 100%, but there is another way. Personally I prefer a coal BBQ any day. This is how it was when I was a kid and the ritural of lighting a fire (or drinking a glass of ice cold chardonnay, while watching your husband lighting a fire) – you just can’t beat it. The smokey flavour of cooking over coals, just adds an extra element to the pizzas and everyone will be coming back for more.

The tricky thing is obviously getting the temperature right, so you don’t burn your base, so you gotta watch your pizza like a hawk. And also you MUST use a pizza stone. But once you’ve tried it a few times, you will master it, and be eating pizza’s with friends and family all summer!

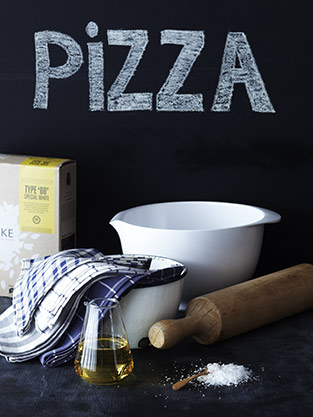
I’m providing you with the recipe for a great pizza dough, that’s my updated version of a pizza recipe I shot for Dish Magazine back in 2010, for their Italian issue. I’ve used wholemeal, stoneground flour for added nutritional benefits, and it is how I prefer my pizza base. Of course you can use plain flour or 00 flour if you like.

Pizza dough
Makes two pizzas, 4-6 serves

1 cup of plain flour or 00 flour
1 cup of stoneground, wholemeal flour
½ teaspoon of sugar
1 ½ teaspoons of instant dried yeast
1 teaspoon of sea salt
1 cup of lukewarm water
1 tablespoon of olive oil

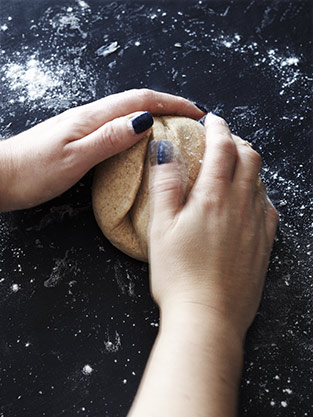
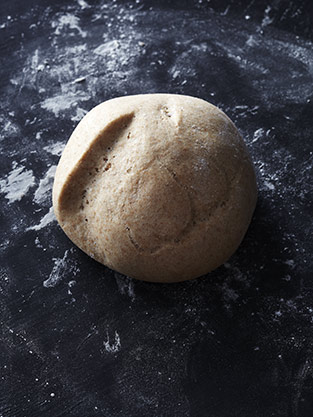
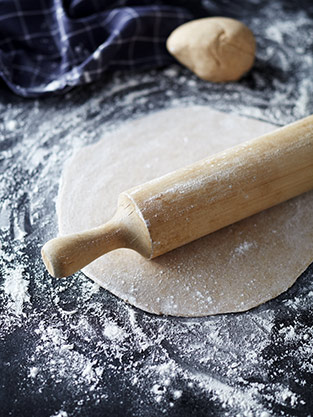
Place all dry ingredients in a large bowl and mix together. Mix the water and oil together in a separate bowl or jug. Gradually add the water to the dry ingredients, little by little, mixing the dough with your hands or a wooden spoon. Be careful not to make the dough too wet and sticky, nor too dry. Once roughly combined turn the dough out on a lightly floured benchtop and knead for 3-5 minutes, until the dough is smooth and slightly sticky and springy. Place it in a lightly floured bowl and cover with plastic wrap or a tea towel. Set aside in a warm place and let rise for 1 – 1½ hour.

Mastering the BBQ & making your pizza

About 10-15  minutes before your dough is ready, start up your BBQ using choal or briquettes. If using briquettes, you might want to get them started around half an hour before the dough is ready. The coal is quicker to start up, but also burns out faster. The briquettes take longer to get ready for cooking, but will hold the heat a lot longer. We usually use coals when it’s just the two of us, and briquettes when cooking for more people.

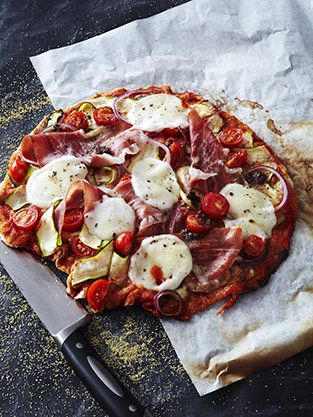
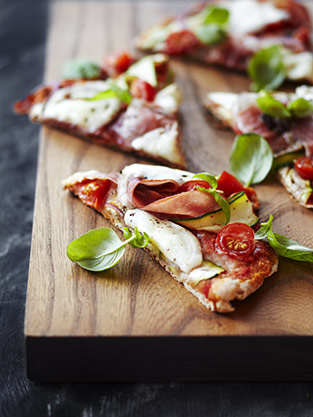
Once doubled in size, split the dough into two portions and roll out thinly on a lightly floured bench top. Place the pizza base on a piece of baking paper, and fill with your favorite filling. I’ve used:

Organic tomato paste
1 whole zucchini sliced sideways with a potato peeler
Red onion, thinly sliced
Cherry tomatoes (from the Curious Croppers)
Prosciutto
Buffalo mozzarella
Homemade pesto
Salt & pepper

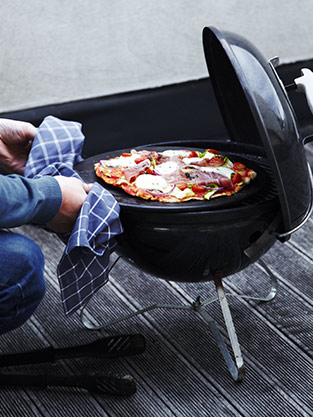
Once the coals or briquettes have settled down, and turned to embers, place your pizza stone on the BBQ about 5 minutes before you’re ready to cook it, to let the stone heat up properly. Then transfer your pizza, with the baking paper underneath, to the pizza stone, and cover your BBQ with the lid. Make sure to have the air vents open, to keep the air circulating around the pizza and ensure even cooking of the base and the top. Depending on the amount of heat in your BBQ, your pizza will cook in 15-20 min. Keep an eye on it every 5-10 minutes, making sure the base doesn’t burn. If the base colours too quickly the BBQ is too hot, and you should wait a little while longer, next time, to let the coal settle a bit more. Once the base has firmed up, you can remove the baking paper. When the base is crispy and the cheese on top slightly melted, garnish with fresh basil. Your pizza is ready to serve!

ENJOY!

Don’t drink and fry!